

Android Build Configuration #
Build configuration tells BuildPiper how to build your Android app. You configure it in App Packaging, either with the BuildPiper UI or with a custom Gradle file that already exists in your repository.
1. Open App Packaging #
Navigation: Application → Service Overview → open the Android service → select the environment → App Packaging.
When CI is not configured, App Packaging offers two options. Click Configure under the option you choose.
| Option | Use it when |
|---|---|
| BuildPiper-UI | You want to enter the Gradle configuration in the BuildPiper wizard: Basic Info, Gradle Configuration and Advanced Configuration. |
| Custom Gradle File | Your project already keeps the required Gradle configuration in the repository. This is also described as Configured via Gradle Path. |
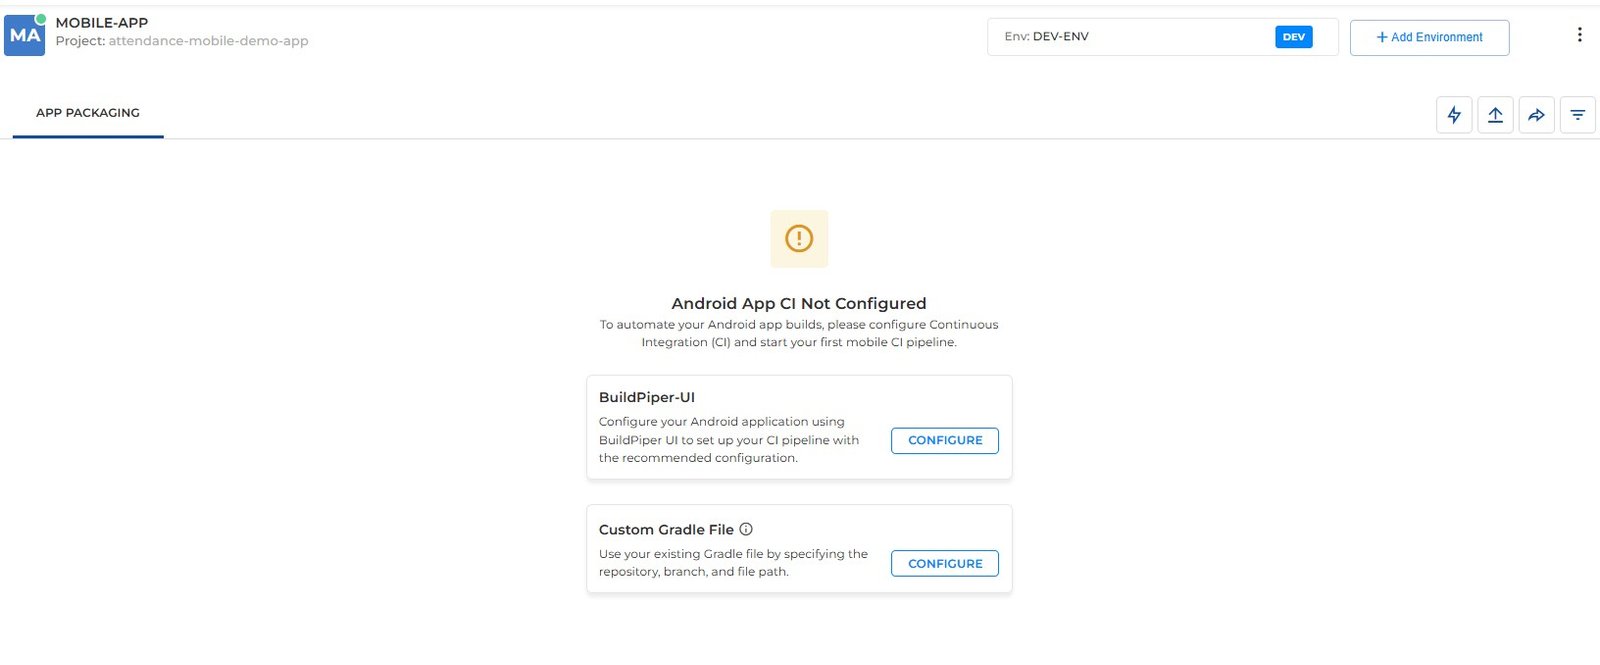
Figure 1: App Packaging page with the two configuration options
2. Configure with the BuildPiper UI #
2.1 Basic Info #
- 1
In Please Select the Git URL, select an onboarded repository.
- 2
Click Load Branches and select the branch in Select Branch.
- 3
Enter the Gradle Build Command and the Artifact Path.
- 4
Set Deploy to playstore. When it is enabled, complete the track, the signing alias and the applicable release status.
- 5
Click Next to continue to Gradle Configuration.
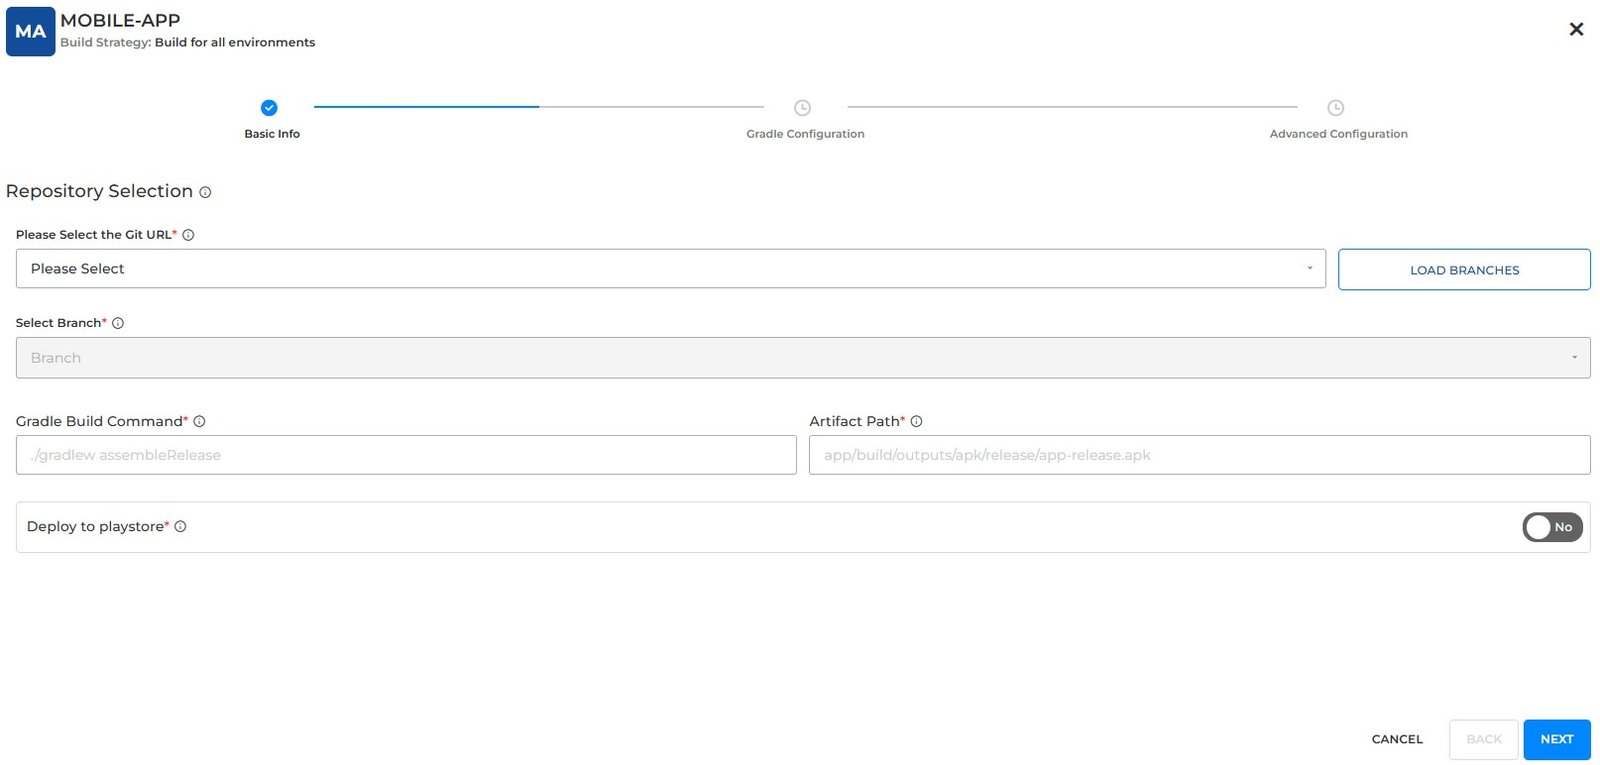
Figure 2: Basic Info repository, command and artifact fields
| Field | Meaning |
|---|---|
| Gradle Build Command | The Gradle command that BuildPiper runs to compile the Android application, for example ./gradlew assembleRelease. |
| Artifact Path | The path where the generated binary (.apk) is saved after a successful build, for example app/build/outputs/apk/release/app-release.apk. |
| Deploy to playstore | Enables the Play Store deployment configuration of the service. Also prepare the deployment credentials of the environment. |
| Select Track | Select the Google Play release track for your Android application. Available tracks include Internal for limited internal testing, Alpha and Beta for testing with selected or broader groups of testers, and Production for releasing the application to users on the Google Play Store. |
| Select App Signing Key Alias | The key alias from the configured signing credential. |
| Release Status | The release state you want, where this control is shown. |
Note: The command and the path must describe the same module, variant and artifact type. The APK example is not a universal path. Make sure the generated format is accepted by your Play Console app and supported by the deployment job.
2.2 Gradle Configuration #
Enter the project metadata, SDK values and Java or Kotlin compatibility settings. Complete the fields that the UI marks as required, using the values of the Android project you want to build.
| Field | What it controls |
|---|---|
| Namespace | The namespace that the Android project uses. |
| Enable Minify | Code shrinking and obfuscation in release builds. |
| Sign the APK | Automatic APK signing with the configured keystore credentials. |
| Compile SDK Version | The Android SDK that compiles the app. |
| Minimum SDK Version | The lowest Android SDK that the app supports. |
| Target SDK Version | The Android SDK that the app targets. |
| Version Name | The human-readable app version, for example 1.0.1. |
| Source Compatibility | The Java language version that compiles the source. |
| Target Compatibility | The Java version that the compiled code targets. |
| JVM Target | The target bytecode level of the Kotlin or Java build. |
| Hybrid App / React Native | Enables the configuration for a hybrid application that needs Node.js. |
| Node.js Version | Appears when Hybrid App / React Native is enabled. Enter the Node.js version of the project. |
Note: Namespace and the Android application ID have different roles. Confirm that the application ID of the resulting artifact matches the App Package Name in the Service Environment. Changing the Namespace does not change the package registered in Play Console.
If you disable Hybrid App / React Native, the Node.js version value is cleared. Enter it again when you enable the switch again. Align the SDK, Java, JVM and Node.js settings with the toolchain your project supports. JVM Target describes the compilation output. It does not decide which Java runtime is available to the build.
Click Next to continue to Advanced Configuration.
2.3 Advanced Configuration #
The last step of the wizard has optional sections that extend the Gradle configuration. Leave a section disabled when you do not need it.
| Section | What to do |
|---|---|
| Gradle Plugins | Enable it when the application needs plugin entries managed through this form. Complete the plugin fields and use Add Another for more entries. |
| Project Dependencies | Enable it to configure additional app dependencies. Complete the dependency fields and use Add Another for more entries. |
Review the entries against the Gradle setup of your project, and then finish the wizard with its save or completion action.
2.4 Confirm the Saved Configuration #
Return to App Packaging and check that the configuration appears as Stable Configuration and IN USE. Review the selected environment, template, repository, branch, command and artifact path before you trigger a build.

Figure 3: Stable Configuration marked IN USE in App Packaging
Expected result: App Packaging has an active configuration for the selected Service Environment, and the service is ready for its first build.
3. Configure with a Custom Gradle File #
Select Custom Gradle File and click Configure when your project already maintains the required Gradle configuration in the repository.
- 1
Select the onboarded Git URL and the Branch.
- 2
Enter the Gradle File Path, which identifies the file in the repository.
- 3
Enter the Gradle Build Command and the matching Artifact Path.
- 4
Review JVM Target and set it if the project requires it. Enable Hybrid App / React Native if needed.
- 5
To deploy to Google Play, enable Deploy to playstore and select Select Track and Select App Signing Key Alias.
- 6
Save the configuration and confirm that it is the configuration in use in App Packaging.
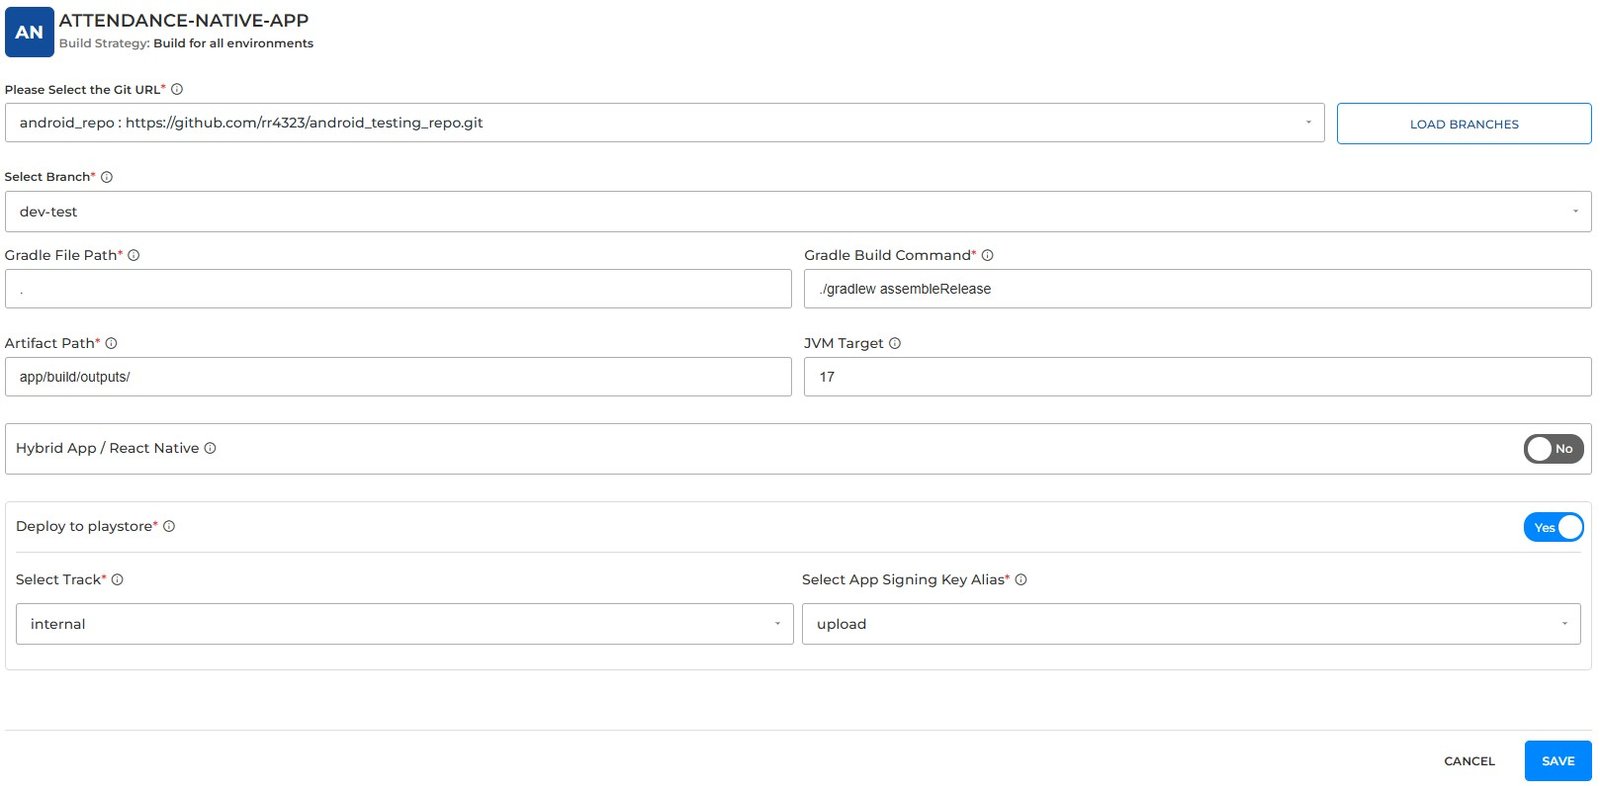
Figure 4: Custom Gradle File configuration
| Field | Example or guidance |
|---|---|
| Git URL and Branch | The onboarded source repository and the branch to build. |
| Gradle File Path | For example app/build.gradle. Use the actual file path in your repository. |
| Gradle Build Command | Specify the Gradle command used to build your Android project and generate the release artifact (APK or AAB). For example, ./gradlew assembleRelease. |
| Artifact Path | Specify the path where the generated Android build artifact (APK or AAB) will be saved after the build process completes. |
| JVM Target | The compilation target that the project requires. |
| Hybrid App / React Native | Enable this option to use the hybrid application workflow during the build process. Provide any additional configuration details required when the option is enabled. |
| Deploy to playstore and Track | Select the Google Play release track for your Android application. Available tracks include Internal for limited internal testing, Alpha and Beta for testing with selected or broader groups of testers, and Production for releasing the application to users on the Google Play Store. |
| App Signing Key Alias | The key alias that fits the signing configuration of the app. |
Note: Keep the three paths separate. Gradle File Path points to the build configuration. Artifact Path points to the generated output of the build. Artifact Name in the Service Environment identifies the storage destination or naming prefix.
The Gradle configuration in the repository must produce the intended release artifact, with the correct application ID, version information and signing behaviour. Review it before you run the build.
Expected result: The saved configuration points to the intended repository file and build output. A successful first build confirms that the branch, command and output path work together.
Read more: Android Actions