

Service-Linked CI
Build configuration is tied to a service and its environment, ensuring each environment can have its own CI settings if required.
UI-Driven Setup
All CI configurations are managed through the BuildPiper UI, allowing platform teams to configure builds without manually editing pipeline files.
CI Configuration Segments #
There are four segments of settings for the CI, each covered in its own section below.
Source Code Details
▸
Repository, branch, build context and Dockerfile path settings.
Advanced Configurations
▸
Specialised settings for cloning, multi-arch builds, shallow cloning and provenance.
CI Variables
▸
Build environment variables and image labels for runtime configuration.
Hook Configurations
▸
Pre-hooks and post-hooks for custom script execution around builds.
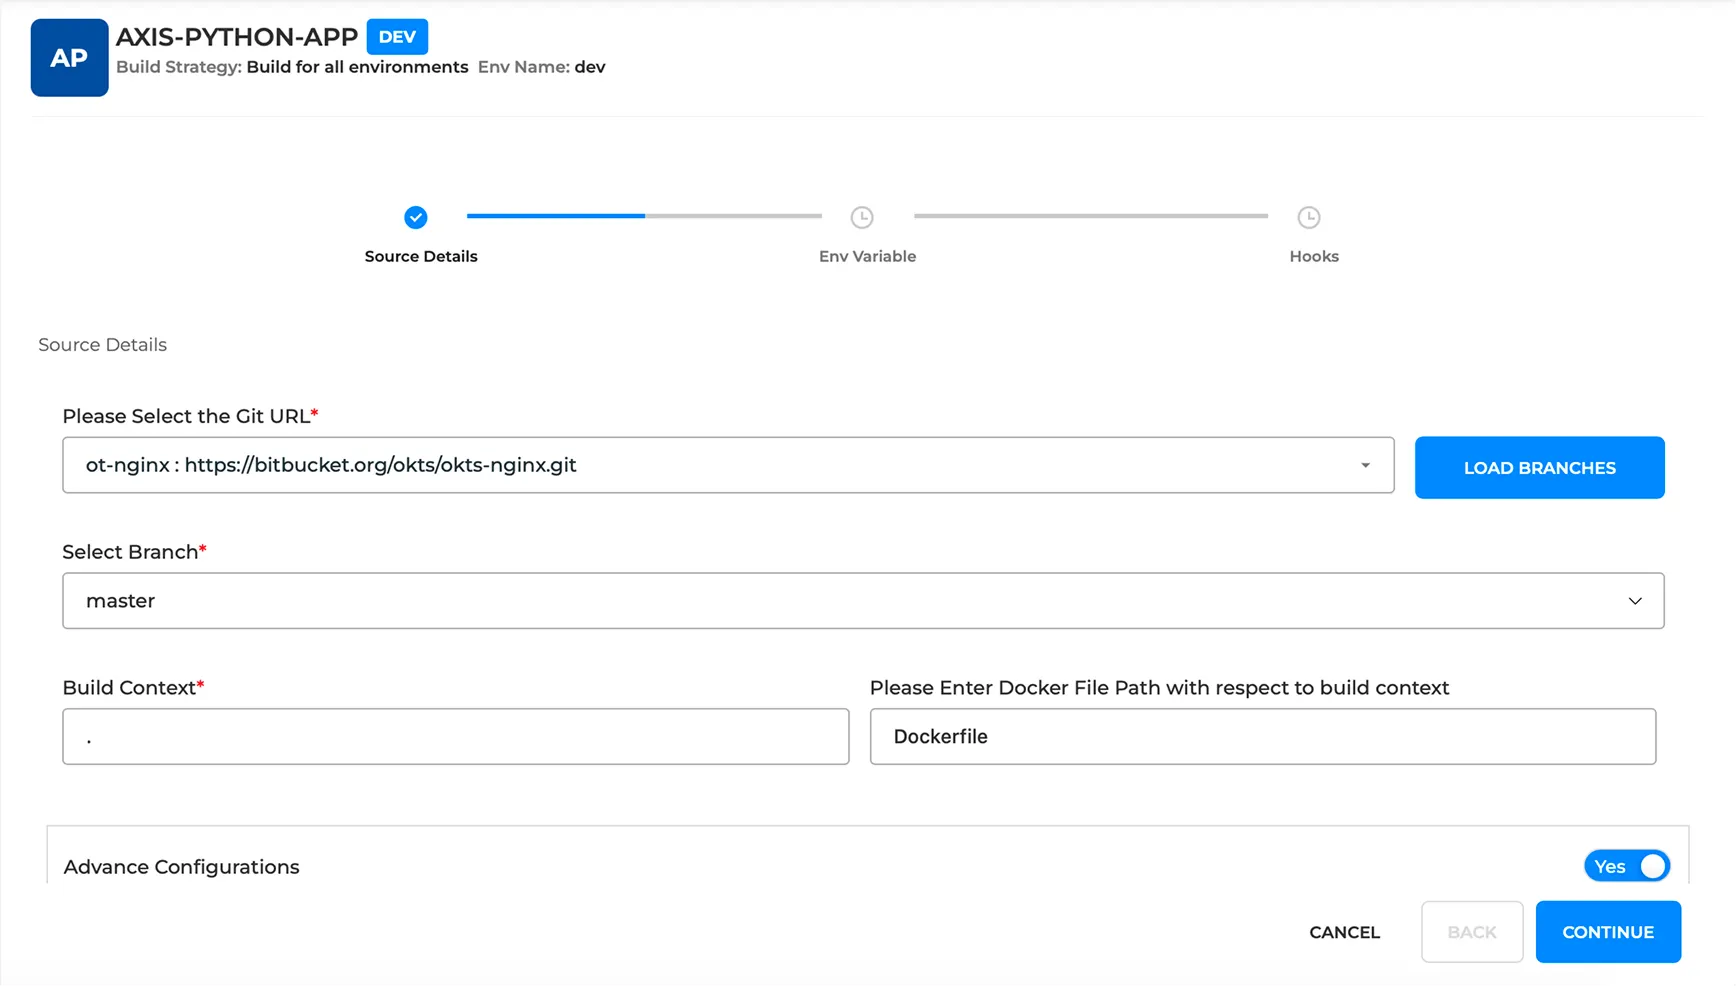
Source Code Details #
These settings tell BuildPiper where to fetch your source code from and how Docker should build the image.
docker build -t myapp .
The trailing dot (.) is the build context — the base location where this command runs.
Advanced Settings #
Advanced settings are configurations that are not enabled by default. They are activated for specific use cases and are controlled through BP system settings.
Note: Each advanced setting must be explicitly enabled from System Settings before it appears in the build configuration UI.
Inspecting Provenance Attestations #
After pushing the image, you can inspect the provenance information without pulling the full image by using the docker buildx imagetools command.
docker buildx imagetools inspect my-app:latest --format "{{json .Provenance}}"
Example output (SLSA provenance):
{
  "SLSA": {
    "buildType": "https://mobyproject.org/buildkit@v1",
    "invocation": {
      "configSource": { "entryPoint": "Dockerfile" },
      "environment": { "platform": "linux/amd64" }
    },
    "materials": [{
      "digest": { "sha256": "8b1e78743a03dbb2c95171cc58..." },
      "uri": "pkg:docker/nginx@alpine?platform=linux%2Famd64"
    }],
    "metadata": {
      "buildStartedOn":  "2026-05-26T15:29:42.923Z",
      "buildFinishedOn": "2026-05-26T15:29:49.530Z",
      "buildInvocationID": "jay7isrli44btwoo832n10n29",
      "reproducible": false
    }
  }
}
This output is the SLSA provenance attestation embedded by Docker Buildx/BuildKit for the image registry.buildpiper.in/ot-light:15. For more details, refer to the Docker Documentation — SLSA Provenance.
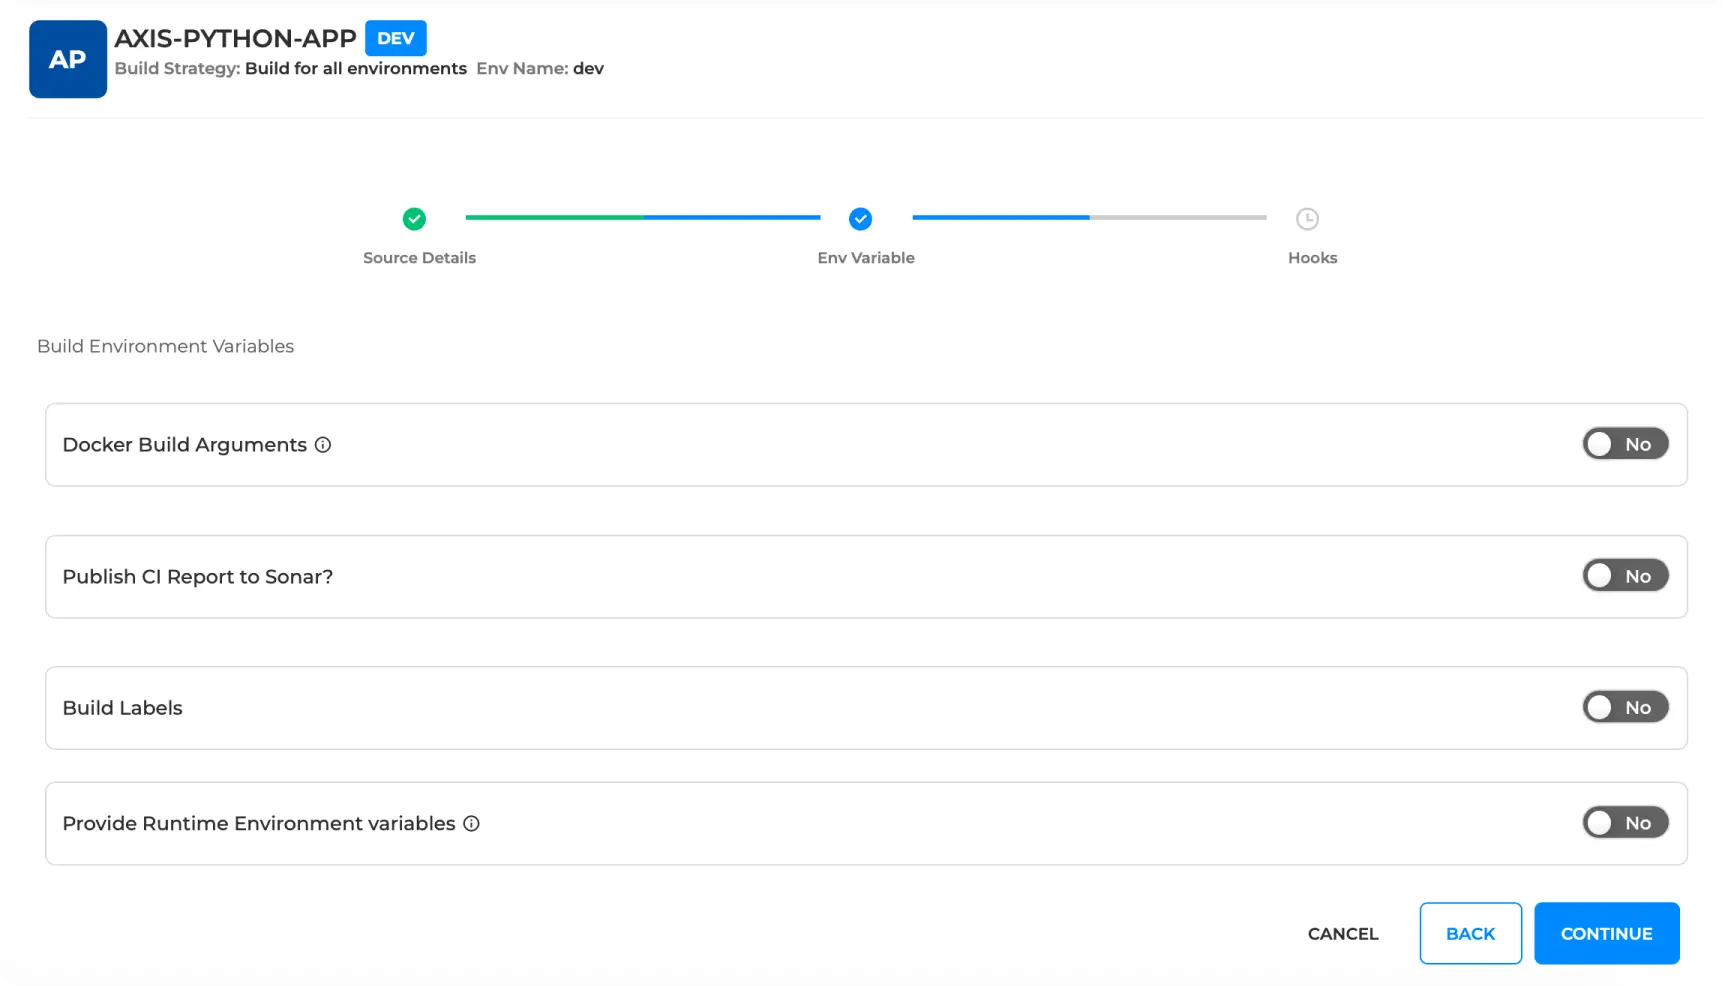
CI Variables #
Configure environment variables and metadata labels that influence build and runtime behaviour.
Build Env Details — Examples #
Defining environment variables in the Dockerfile:
ENV APP_ENV=production
ENV PORT=8080
Or passing variables at runtime:
docker run -e APP_ENV=staging -e PORT=3000 myapp
Build Labels — Inspecting #
Fetch the labels embedded in an image:
docker inspect --format='{{.Config.Labels}}' myimage
Sample output:
{
  "Config": {
    "Labels": {
      "version": "1.0",
      "maintainer": "team@company.com"
    }
  }
}
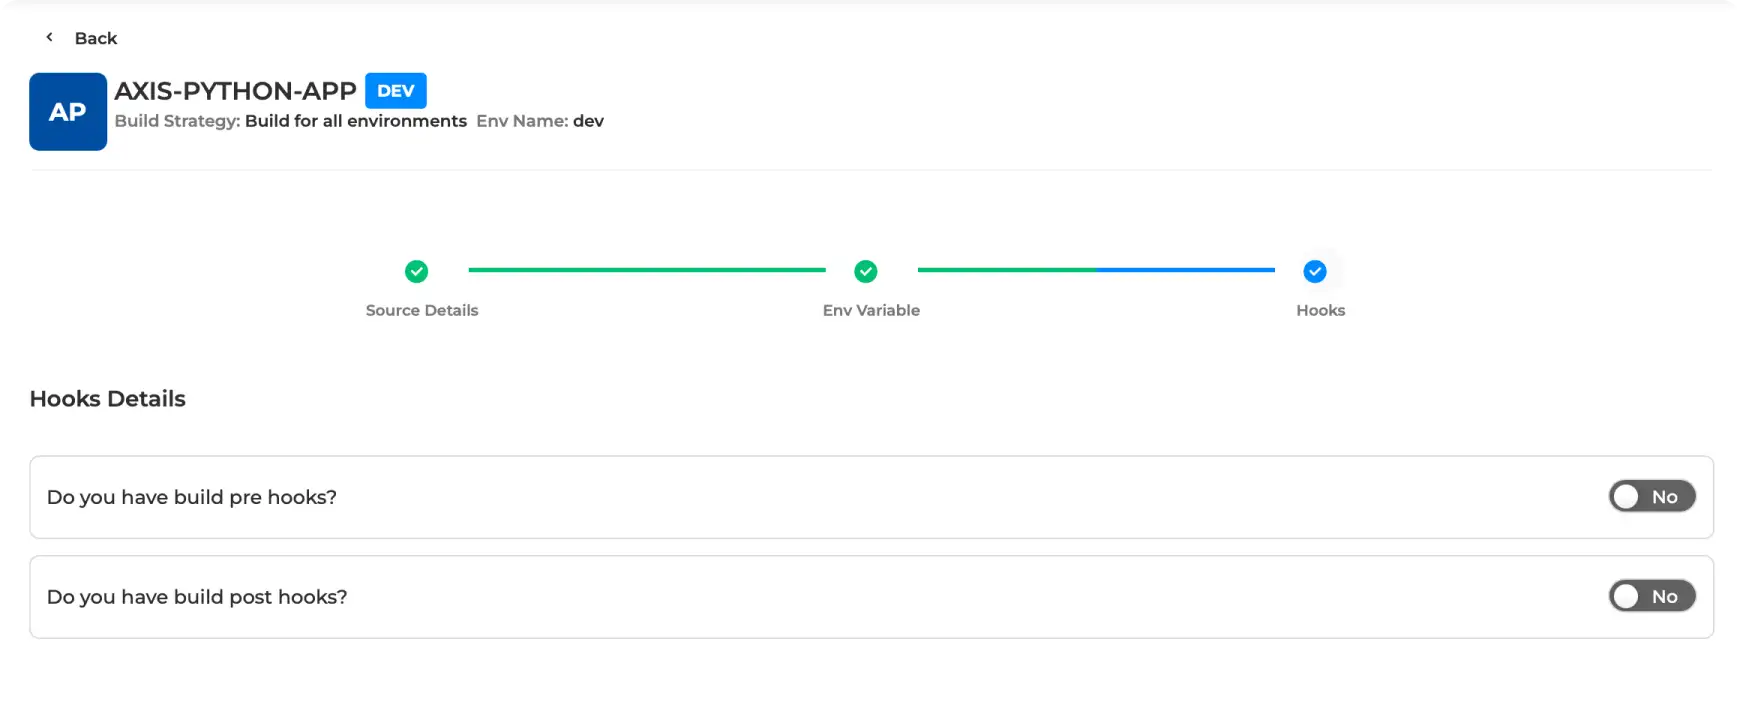
CI Hooks #
BuildPiper provides the ability to set up custom pre-hooks and post-hooks during the build information stage, enabling the execution of custom steps before and after the creation of the Docker image.
Pre-hooks and post-hooks can be added via the three options offered by BuildPiper:
Via Command
Run a Command directly inside the build environment.
Via File Upload
Upload a script file and enter the command arguments.
Via Git
Select the Git URL, branch, file/folder path and enter command arguments.
Workflow & Navigation #
The BuildPiper workflow to configure CI for a service is detailed below.
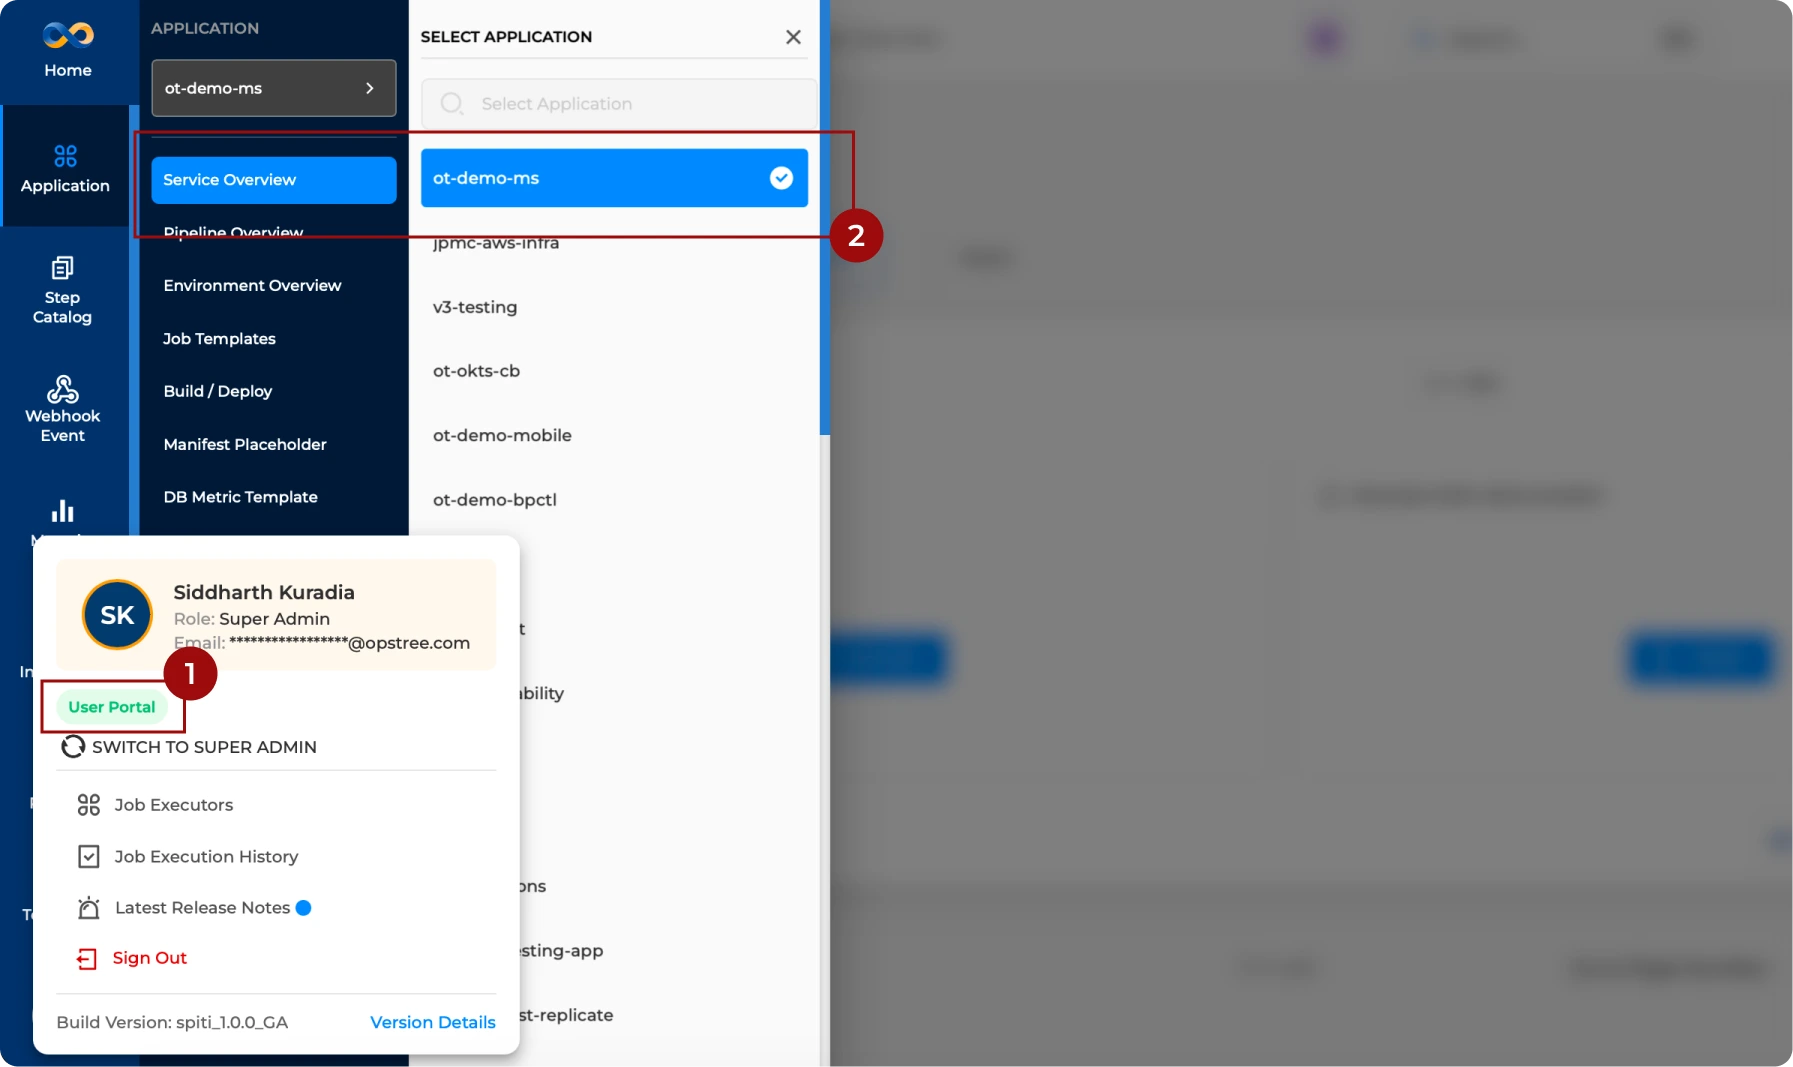
Note: The BP Environment onboarding page is accessible inside the User Portal.
BP Snapshots #
Reference screenshots showing each stage of the CI configuration flow inside BuildPiper.
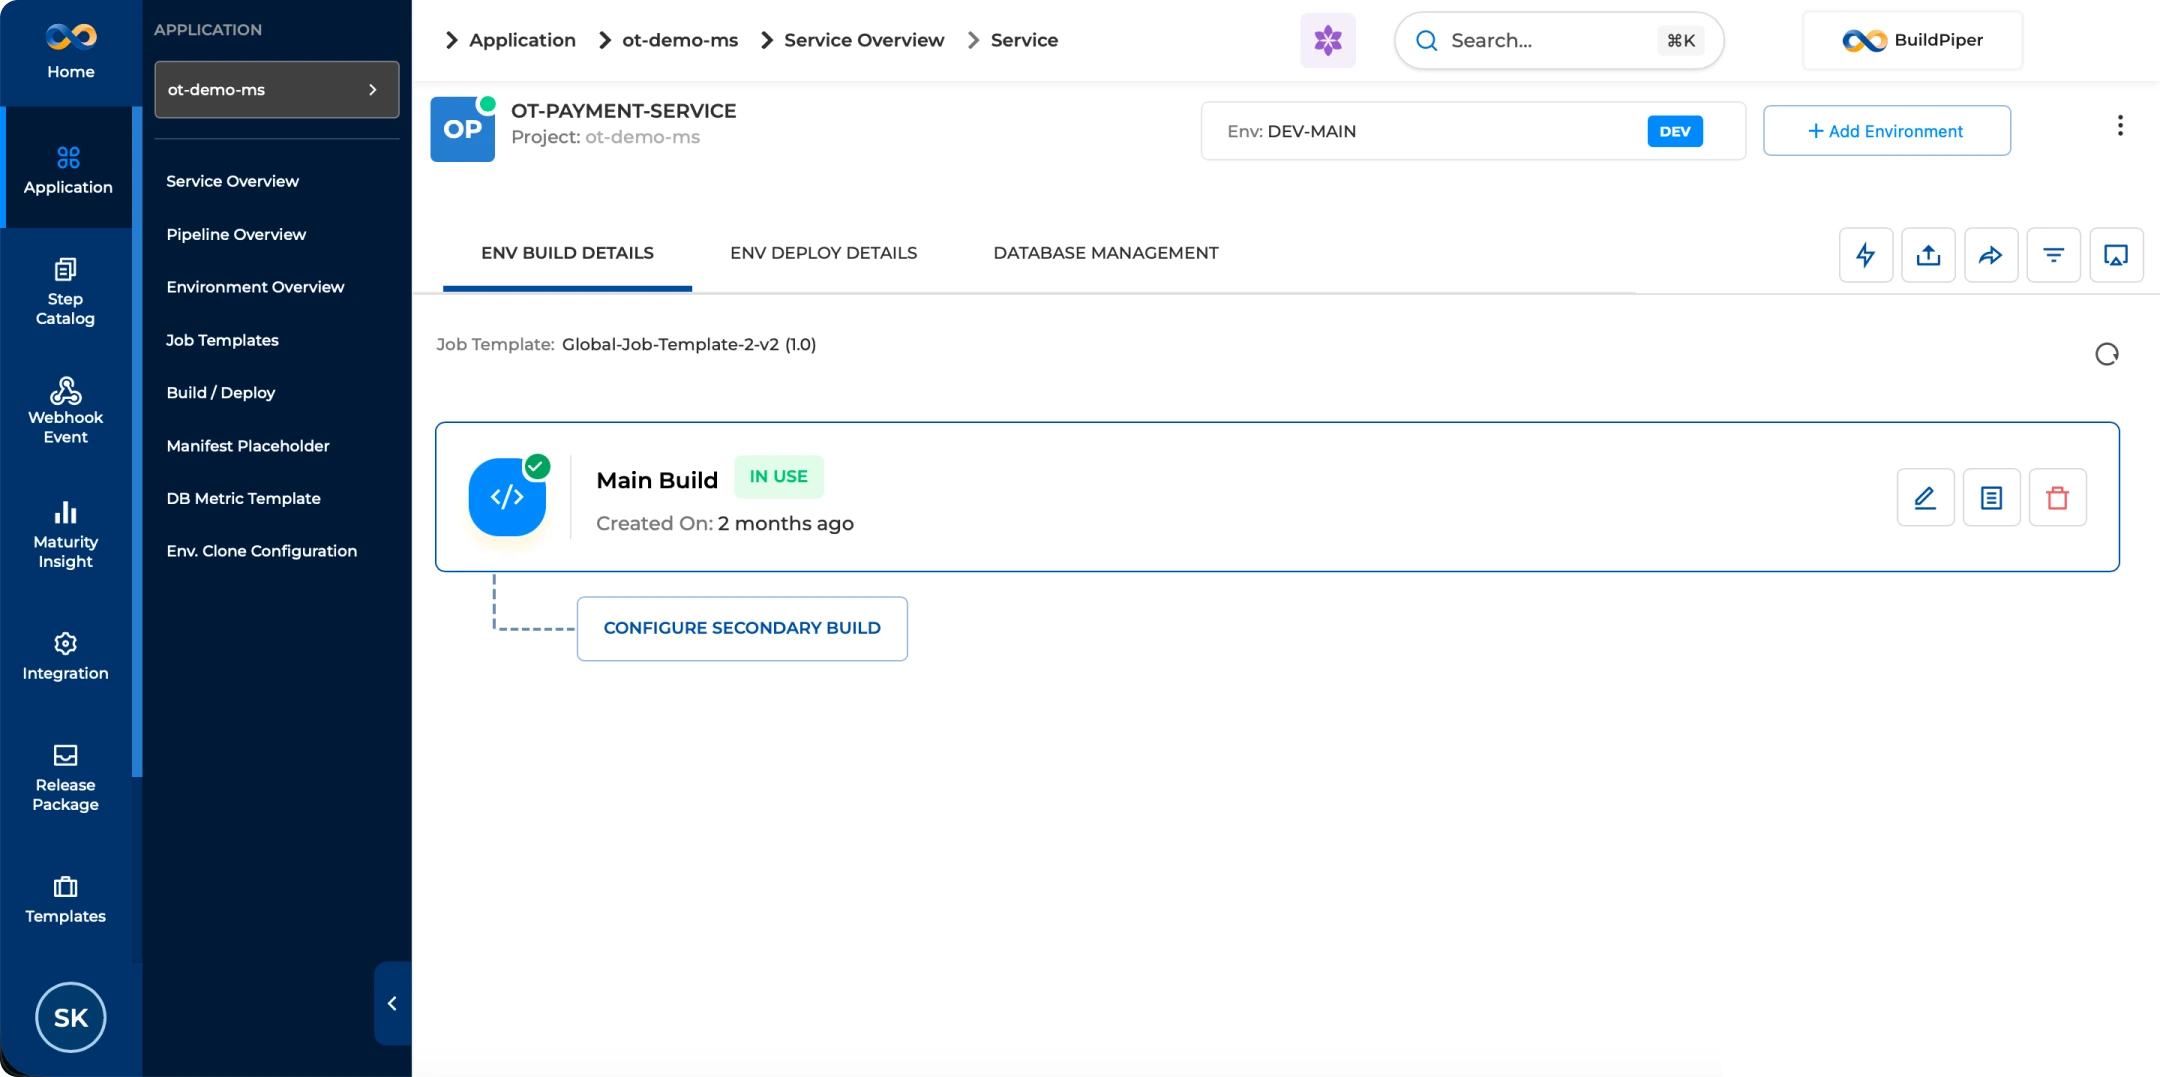
BP Snapshot: Configuring CI for a new service.
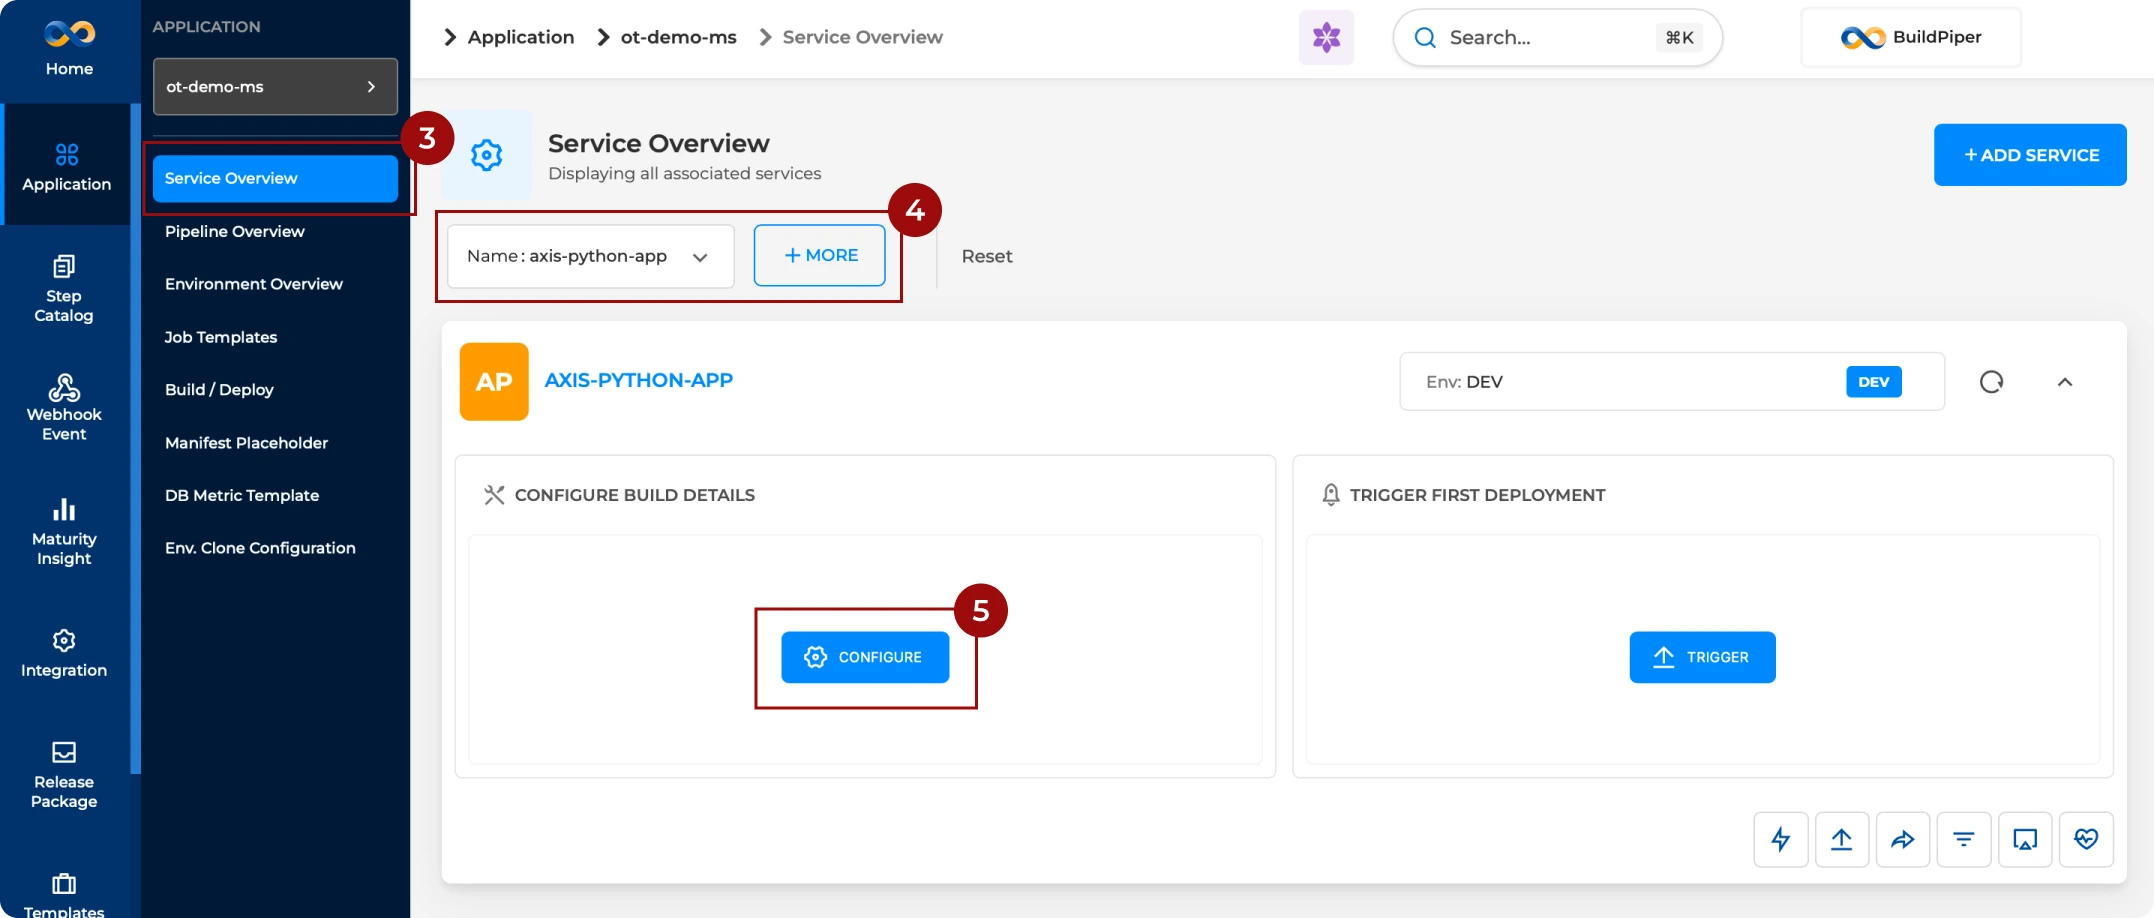
BP Snapshot: Navigating to CI configuration.
BP Snapshot: Configuring build for a service — CI Source Details.
BP Snapshot: Configuring build for a service — CI Env Variables.
BP Snapshot: Configuring build for a service — CI Hooks (pre & post).
BP Snapshot: CI configurations being saved in UI.
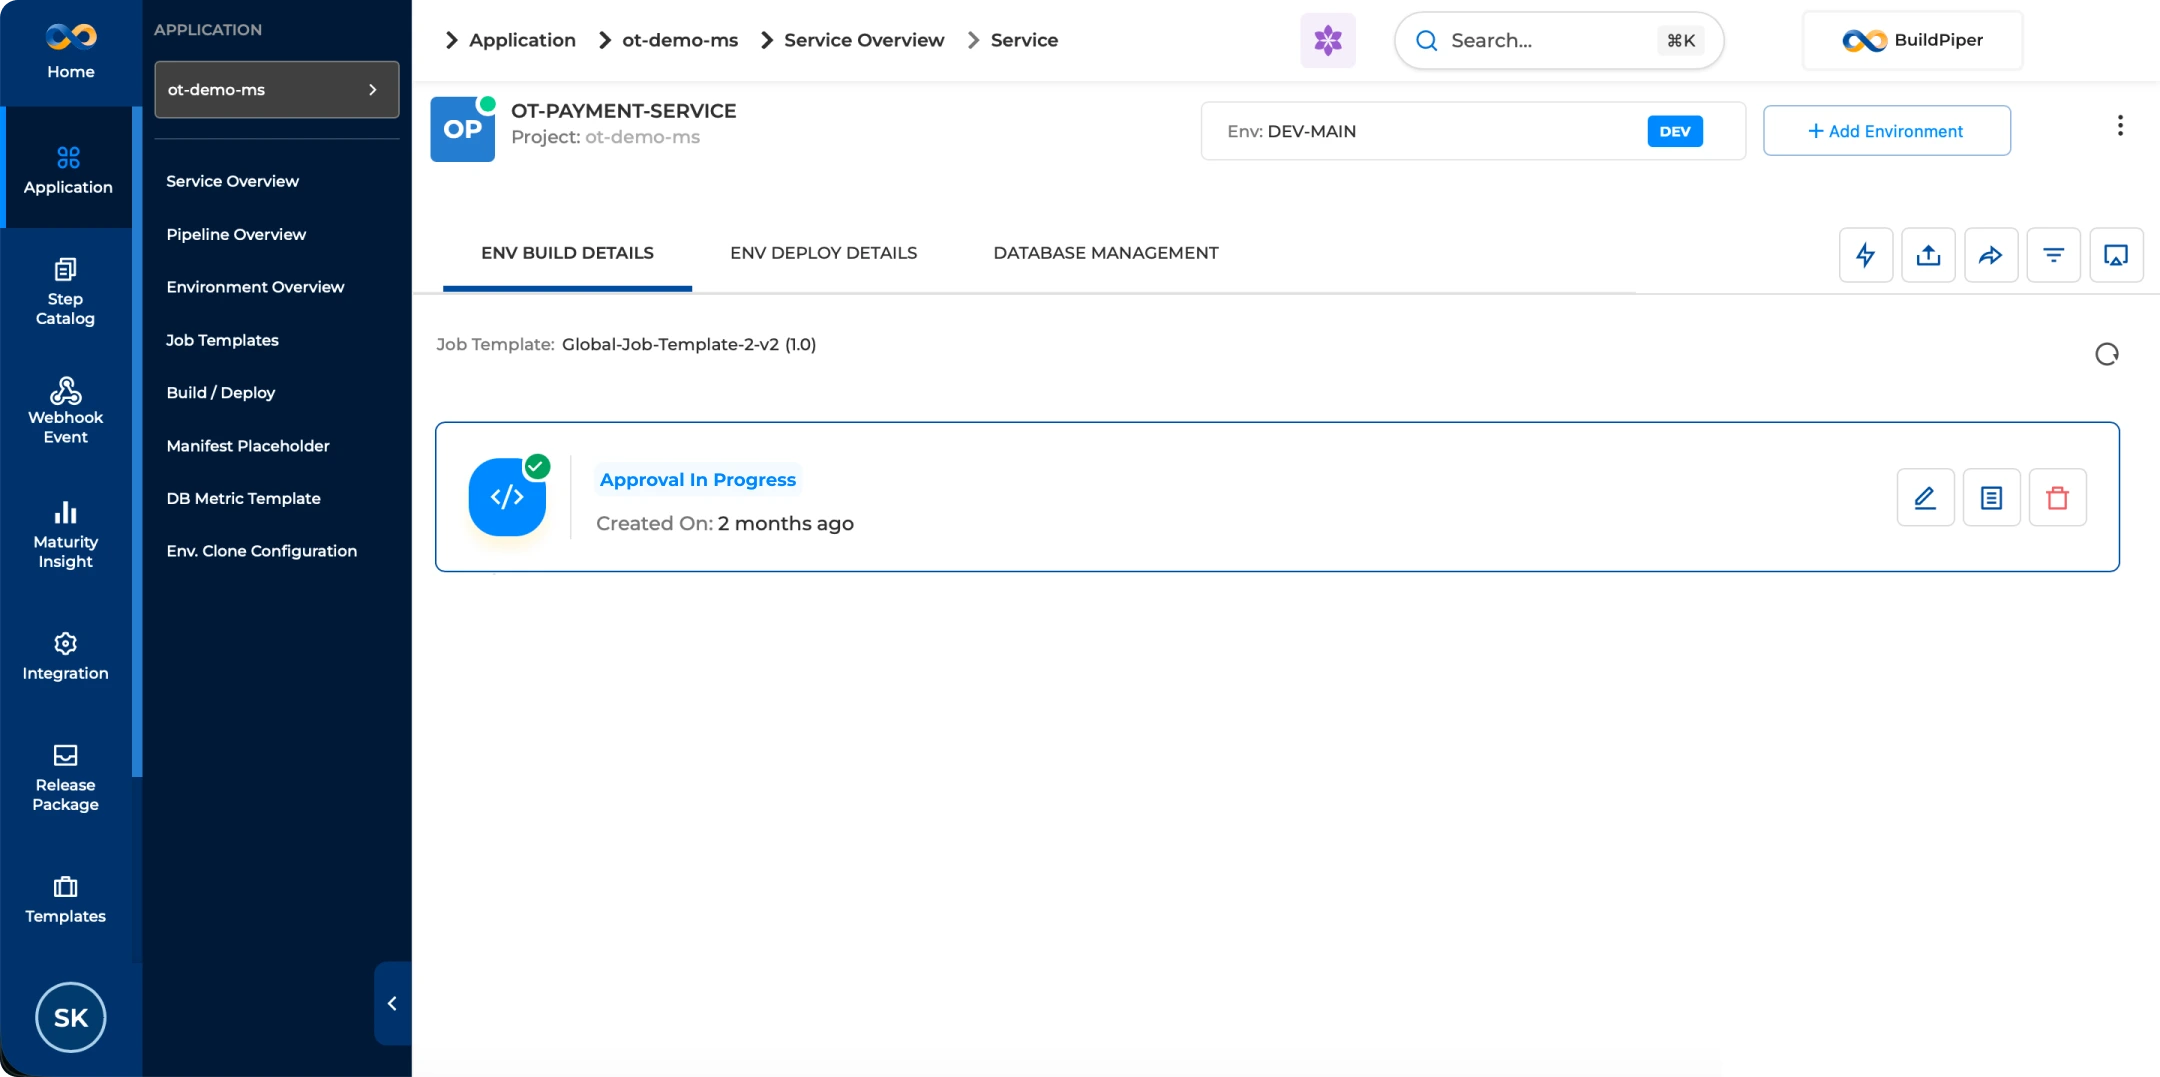
BP Snapshot: CI configuration updated from Approval in Progress to In-use via BP versioning job.
BuildPiper Documentation · Configuring the Build
Last updated: May 2026