

User Groups #
A User Group collects policies so that they can be assigned to many users at once. Use groups for teams or responsibilities that need the same access, such as development, release operations or read-only support. Manage the policies once in the group, and then attach the group to the users.
A User Group contains policies, while a Permission Group contains the permissions of an entity. Create the policies before you create the group. Assign users to the group from Manage Users.
1. View User Groups #
- 1
Switch to or stay in the Super Admin Portal.
- 2
Click Manage User in the left menu.
- 3
Click Manage User Groups. To create a group, click New User Group.
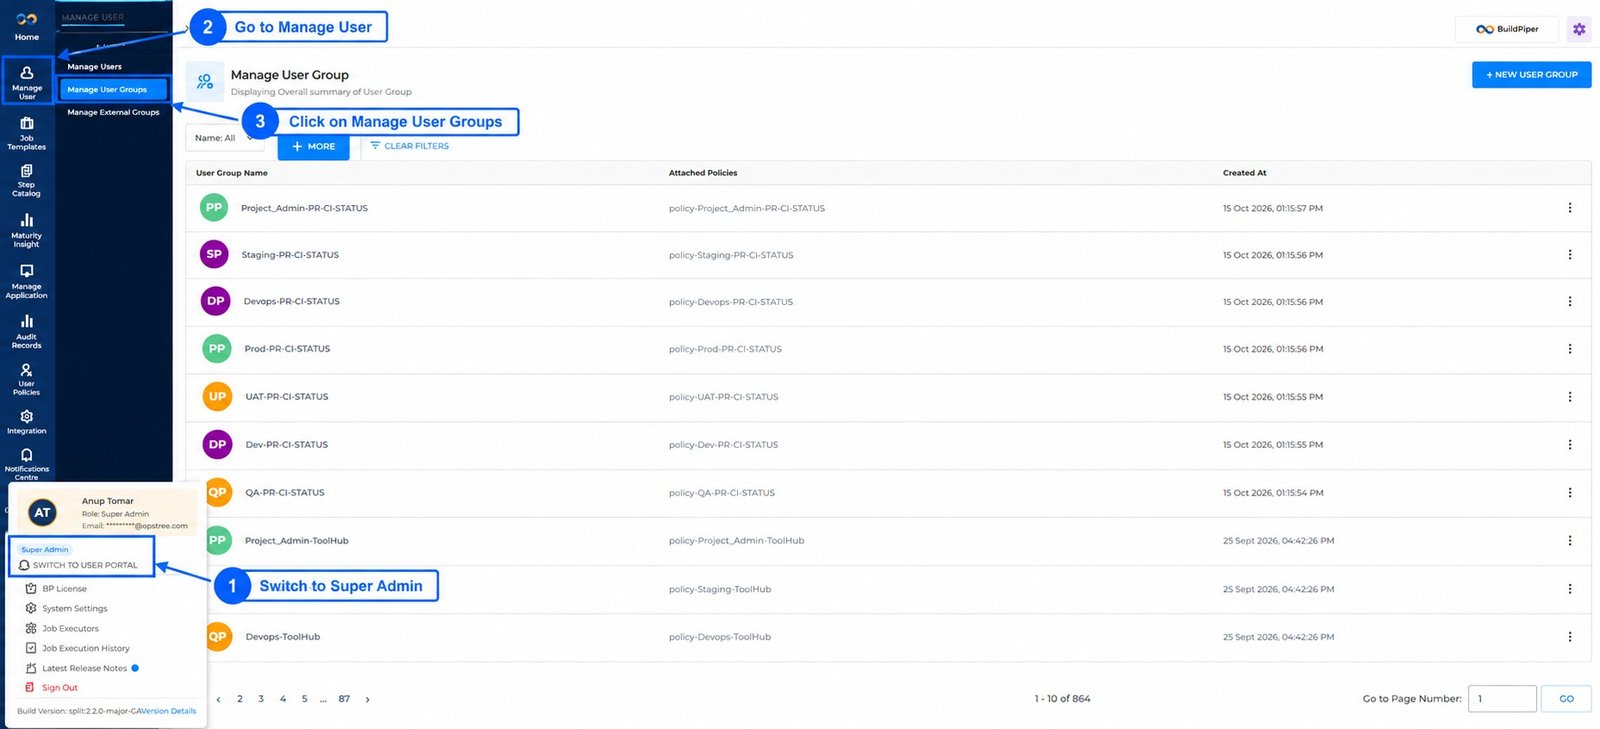
Figure 1: Navigation to Manage User Groups
| Column | What it shows |
|---|---|
| User Group Name | The name of the internal group. |
| Attached Policies | The policies of the group. Expand +N to see hidden policies. |
| Created At | The date and time of creation. |
| Three-dot menu | The actions available for the group. |
Use the Name filter to find a group, and add Attached Policies from the additional filters to find groups that contain a policy. A disabled action means that your account lacks access to that operation.
2. Create a User Group #
- 1
Click New User Group.
- 2
Enter the User Group Name, for example release-operators.
- 3
Under Assign Policies to the User Group, select the policies in Select Policies.
- 4
Click the right arrow to move them to Assigned Policies. To remove one, select it there and click the left arrow.
- 5
Click Save and confirm that the group appears in the list with the intended policies.
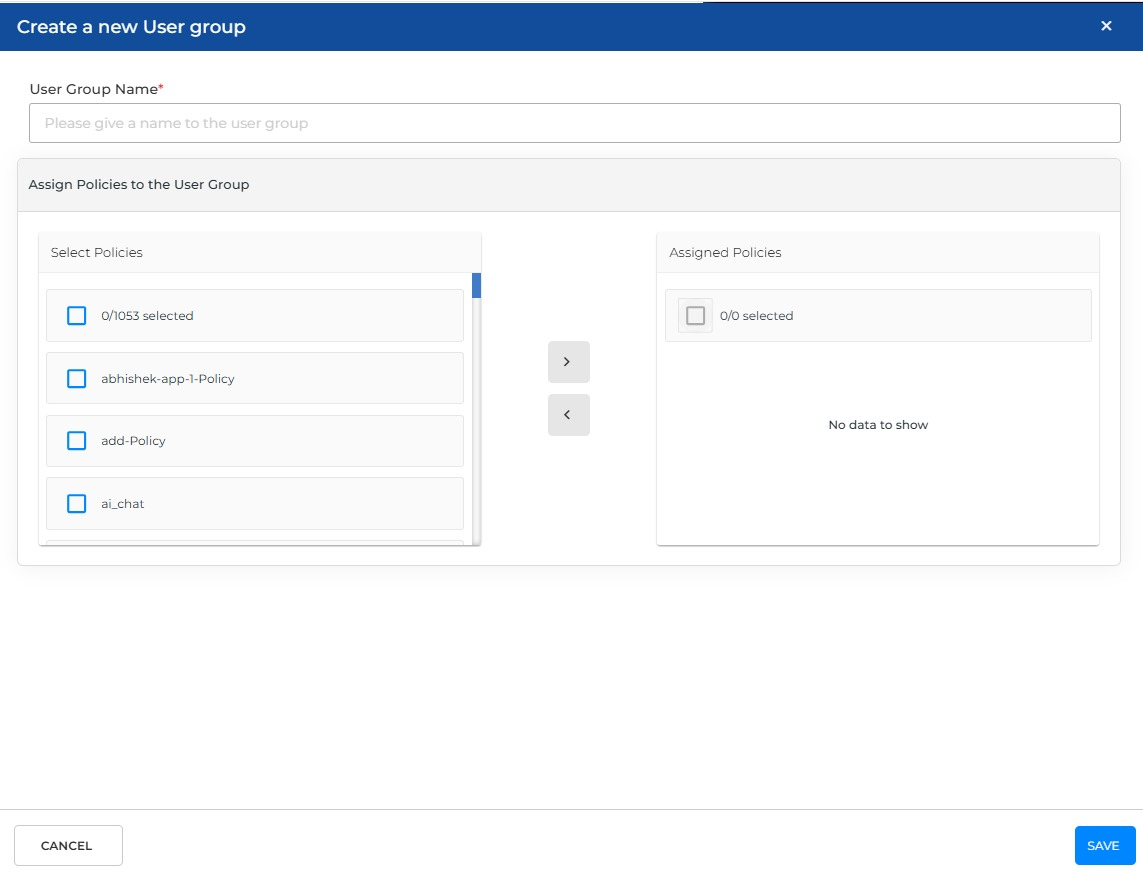
Figure 2: Create a new User group
A group name and at least one assigned policy are required. A checkbox alone does not assign a policy. Move it to the assigned pane.
3. Edit and Delete a User Group #
| Task | Steps |
|---|---|
| Edit | Open the three-dot menu and select Edit. Update the User Group Name or move policies between the panes, keep at least one assigned policy, and click Save. |
| Delete | Select Delete from the three-dot menu and follow the shared deletion procedure. |
Note: A shared group can affect many users, so review its purpose before you change its policies. To add or remove the membership of one user, use Edit User in Manage Users.
4. Troubleshooting #
| Situation | What to do |
|---|---|
| No Policies Available | Create the required policy first and reopen the form. Also check that your account can access the policies. |
| Please Select Policy | Move at least one policy into Assigned Policies before you save. |
| The group does not appear | Clear the filters, check the other result pages and confirm that the save succeeded. |
| Membership must change | Open Manage Users, select Edit User, update User Group and click Update Details. |
| A user has unexpected access | Review the User Groups and the direct policies of the user, and the scope of the policies. |
Read more: Users