

Notification History #
The Manage Notifications page displays a record of all notifications sent by BuildPiper. Use this page to verify notification delivery status, investigate delivery failures, and resend notifications when required.
1. View Notifications #
- 1
Click Notifications Centre in the left menu.
- 2
Click Manage Notifications.
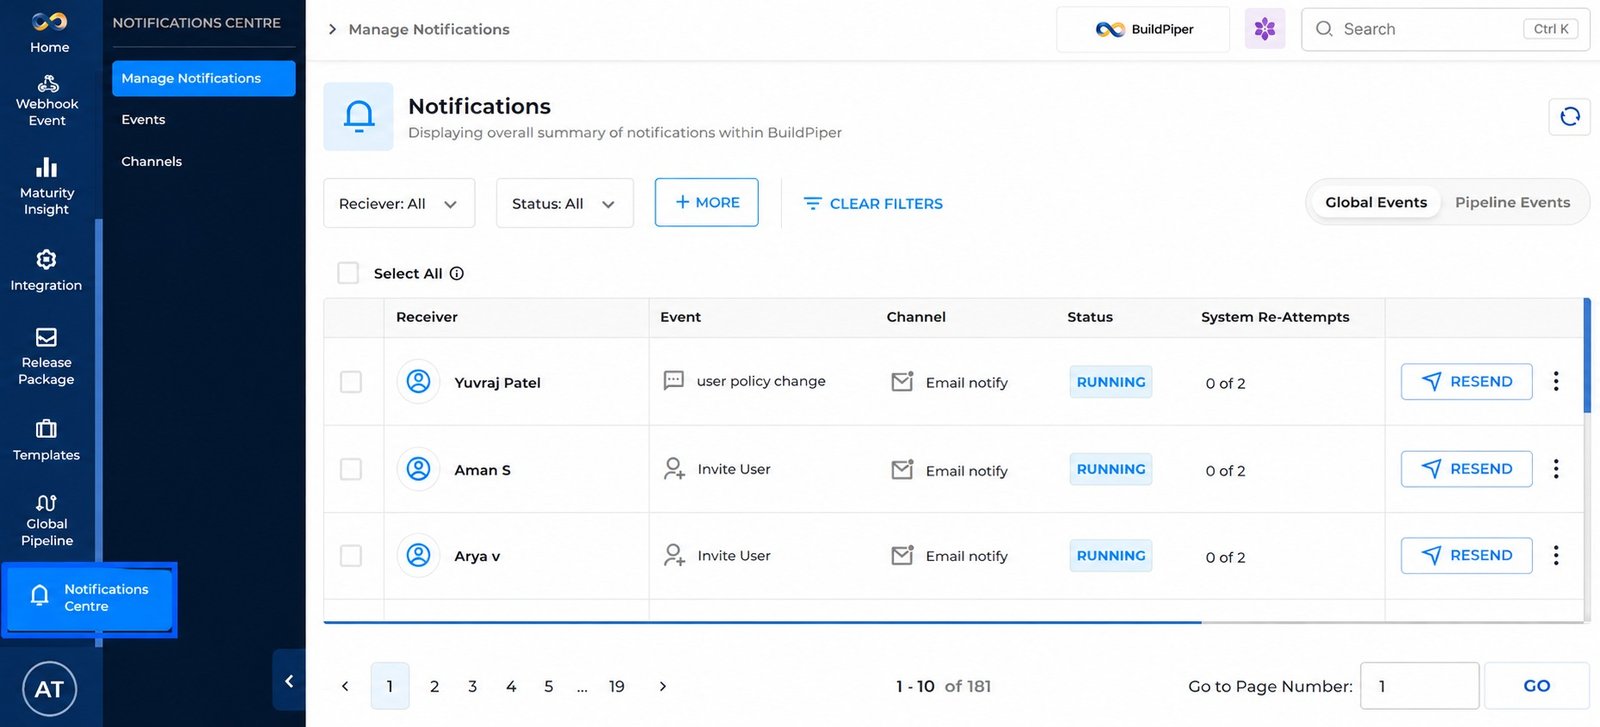
Figure 1: Manage Notifications, Global Events tab
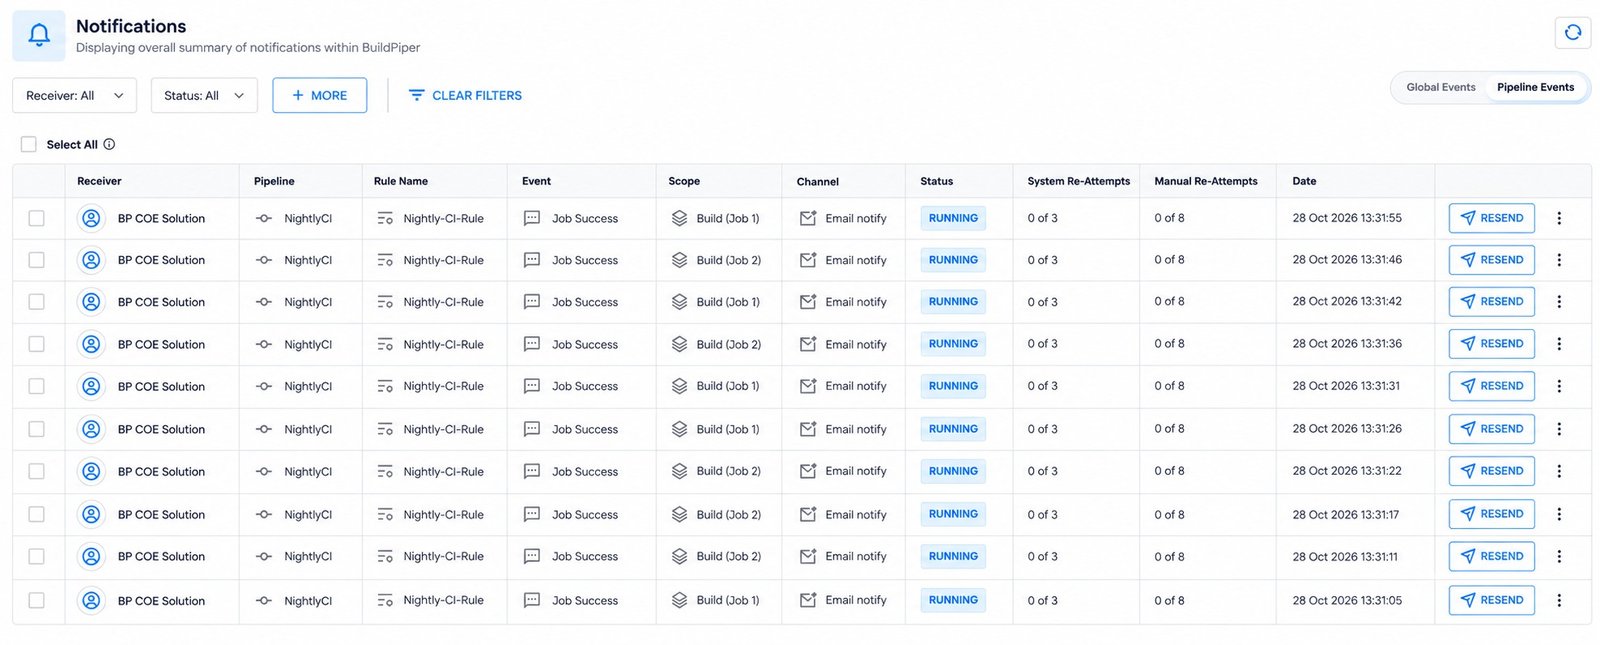
Figure 2: Manage Notifications, Pipeline Events tab
| Column | Description |
|---|---|
| Status | Displays the notification’s current status. Available filter values include Success, Failed, Pending, Skipped, and Revoked. Notifications that are currently being processed are displayed with the status RUNNING. |
| System Re-Attempts | Displays the number of automatic retry attempts used out of the configured maximum. For example, 0 of 2 indicates that no automatic retries have been used out of the two allowed attempts. |
| Manual Re-Attempts | Displays the number of manual resend attempts used out of the permitted limit. For example, 0 of 8 indicates that no manual resend attempts have been used out of the eight allowed attempts. |
| Status | Meaning |
|---|---|
| RUNNING | The notification is being processed. |
| FAILED | The notification failed during delivery. |
| SKIPPED | The notification was not processed. |
A notification is SKIPPED when the event is turned off, the channel is turned off, or the event-channel mapping is turned off.
2. Filters #
Receiver and Status are displayed by default. The More option adds filters for Events and Channels, along with Rule Name and Pipeline on the Pipeline Events tab. Click Clear Filters to reset all applied filters.
3. Actions #
| Action | Description |
|---|---|
| Resend (per row) | Sends the notification again and uses one manual re-attempt. |
| Bulk resend | Tick rows (or Select All) and click Resend next to “n Selected”. Only notifications with manual attempts left can be resent. |
| View Logs (three-dot menu) | Opens the delivery log for that notification in a new browser tab, with an All Events panel and the log output. |
4. Retries #
| Option | Description |
|---|---|
| System re-attempt | BuildPiper retries a failed notification automatically. The number of retries is set for each event, in Manage Re-Attempts. |
| Bulk Retry | Retries several failed notifications at once. |
| Bulk Resend | Sends several notifications again, whatever their earlier status. |
Note: The retry count increases with each attempt. A notification is not retried beyond the limit that is set for the event. Before you retry, make sure that the event, the channel and the mapping are turned on, and check the logs.
The logs show the execution details, the error messages, and the response of the channel.
5. Notification Settings #
The retention and retry limits of notifications are set in the system settings.
- 1
Open System Settings.
- 2
Select Notifications & Alerts. The Notification Setting page opens.
- 3
Enter the values described below.
- 4
Click Apply Immediately or Apply Async.
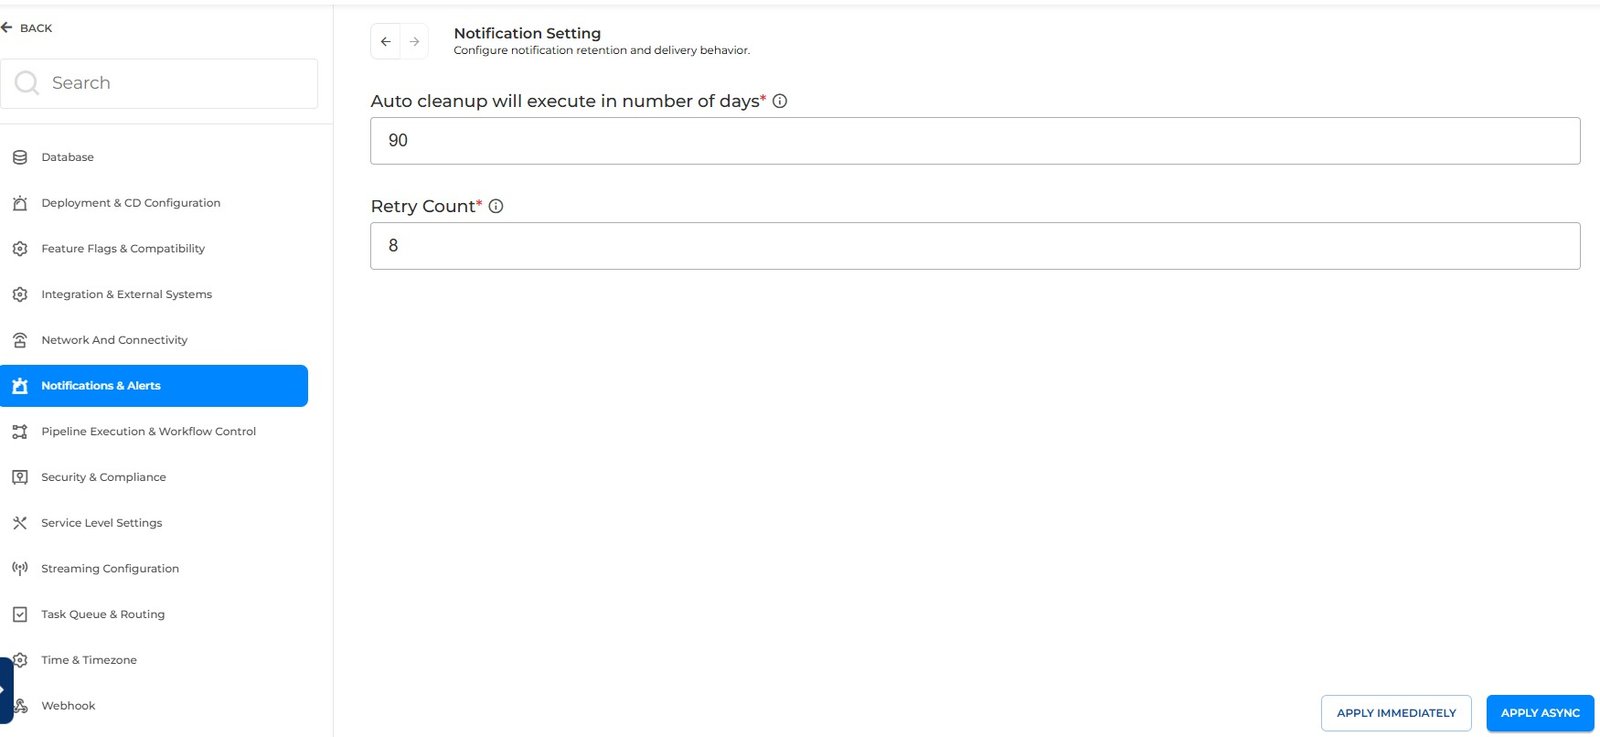
Figure 3: Notification Setting
| Field | Description |
|---|---|
| Auto cleanup will execute in number of days | The number of days after which the automatic cleanup runs. The value shown is 90. It is required. |
| Retry Count | The retry count for notifications. The value shown is 8, which is the same as the manual re-attempt limit in Manage Notifications, for example “0 of 8”. It is required. |
Read more: Notification Events