

Pipeline Notification #
Pipeline notifications are configured individually for each pipeline, rather than through the Events page. Each notification rule associates a pipeline event with one or more channels. For each channel, you can configure the message template and recipients to determine how and to whom the notification is delivered.
Note: Create the channels before you add a rule. See Notification Channels.
1. Open the Rules of a Pipeline #
- 1
Open the pipeline list: Global pipelines, or the Pipeline Overview of the application.
- 2
On the pipeline card, click the three-dot menu and select Edit Pipeline.
- 3
Click the bell icon (tooltip Notification Rule) in the toolbar, next to Save Workflow.
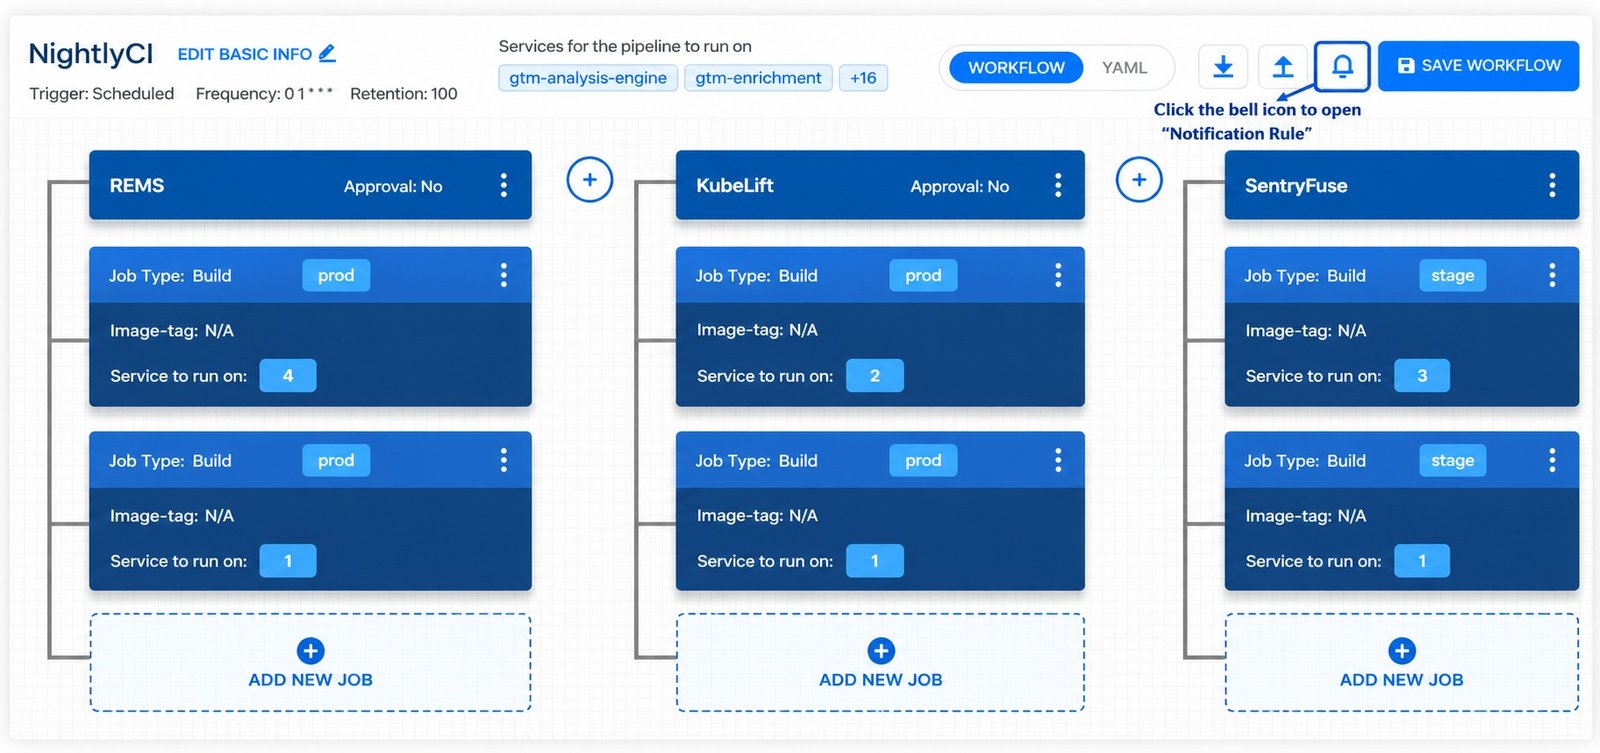
Figure 1: Edit Pipeline, bell icon (Notification Rule)
The page is titled Pipeline Notification Rule for “<Nightly CI Pipeline>”. It shows On/Off, Rule Name, Event, Scope and Notifications Channels, with the Rule Name, On/Off and More filters, and an Add Rule button.

Figure 2: Pipeline Notification Rule page
2. Add a Rule #
Click Add Rule. The wizard has five steps.
2.1 Step 1: Basic Info #
Enter a Rule Name. Leave Enable Rule on to activate the rule when it is saved. Click Continue.

Figure 3: Basic Info
2.2 Step 2: Event Type #
Pick one event. It is required.
| Level | Events |
|---|---|
| Pipeline | Pipeline Start, Pipeline Success, Pipeline Failure, Pipeline Trigger Failure, Pipeline End. |
| Stage | Stage Start, Stage Success, Stage Failure, Stage End, Stage Approval, Stage Approval Failure. |
| Job | Job Start, Job Success, Job Failure, Job End. |
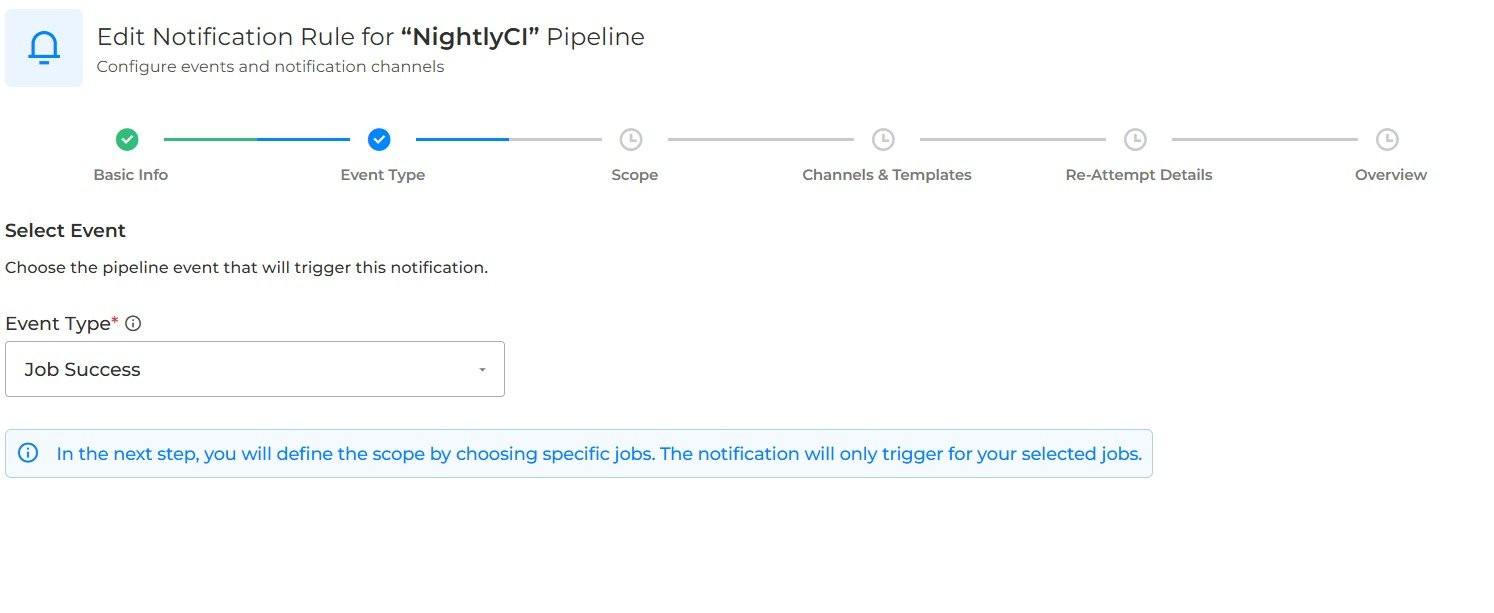
Figure 4: Event Type
For a pipeline event, the page shows the message “This event applies to the entire pipeline — no stage selection needed.”
For stage and job events, a scope step follows. Tick the stages or jobs that the rule covers. You must pick at least one (“Please select at least one job to proceed”). A pipeline with no jobs cannot use job events.
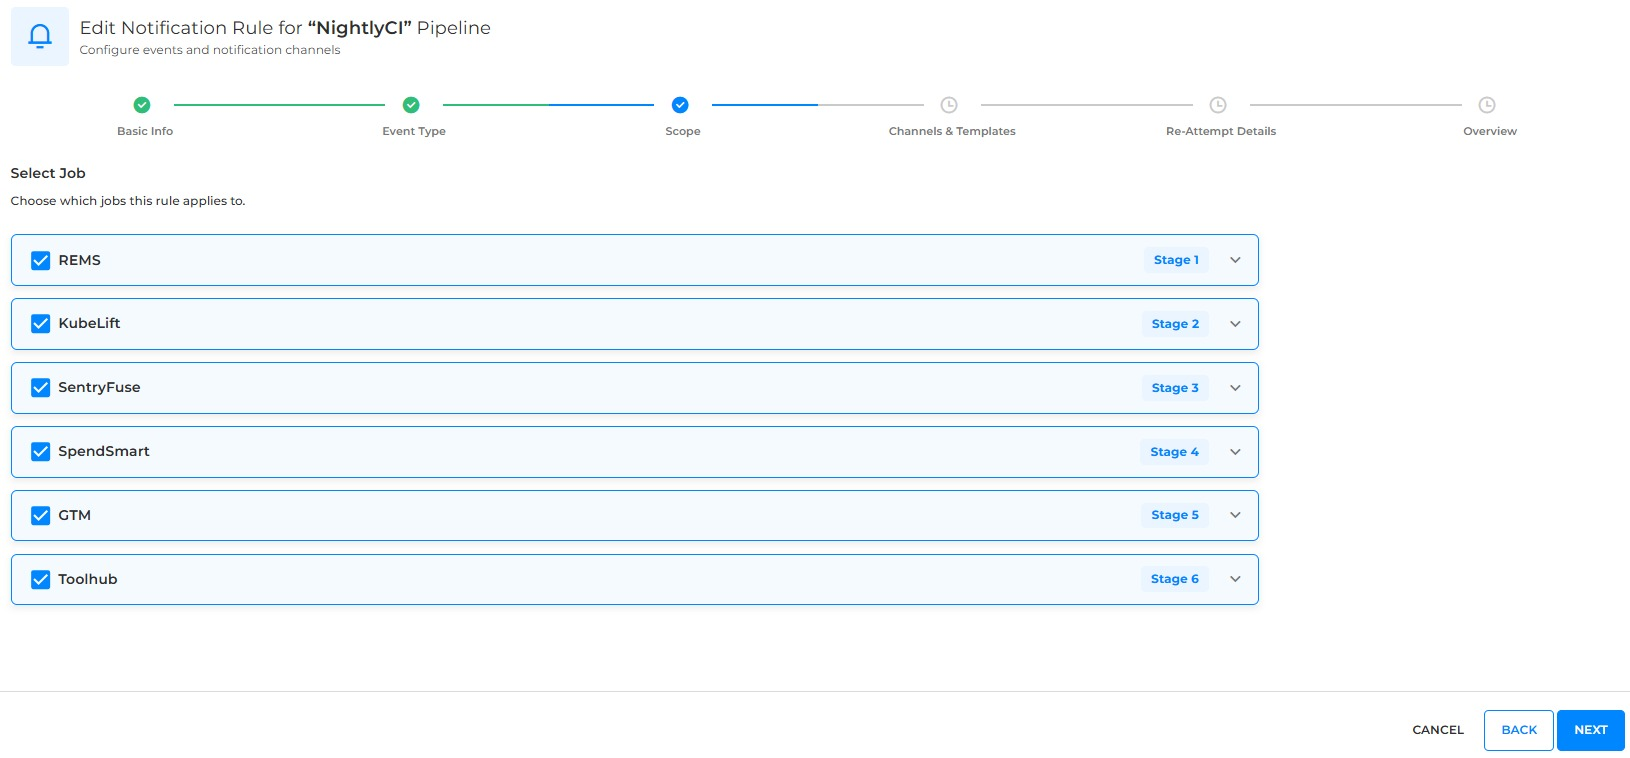
Figure 5: Scope
2.3 Step 3: Channels and Templates #
Add one or more channels in Select Channel(s), or pick All. Each channel gets its own expandable panel. The bin icon removes it.
| Setting | Description |
|---|---|
| Pre-baked Template | Select one of three template variants for each channel type: Complete, Services, or Pipeline Details. For example, Pipeline Slack Notification (Services). |
| Custom Upload | Upload your own template file. For email notifications, the supported format is .html. Click View Template(s) to download a pre-built template that you can use as a starting point for customization. |
| Available Variable(s) | View the list of supported placeholders that can be used in the notification template. |
| Recipients, Email | Enter the DL Name and DL Email. Both fields are mandatory. Click + Add DL to add additional distribution lists. |
| Recipients, Slack | Enter the Channel Name (for example, #deployment-alerts) and the Webhook URL. Both fields are mandatory. Click + Add Channel to configure additional Slack channels. |
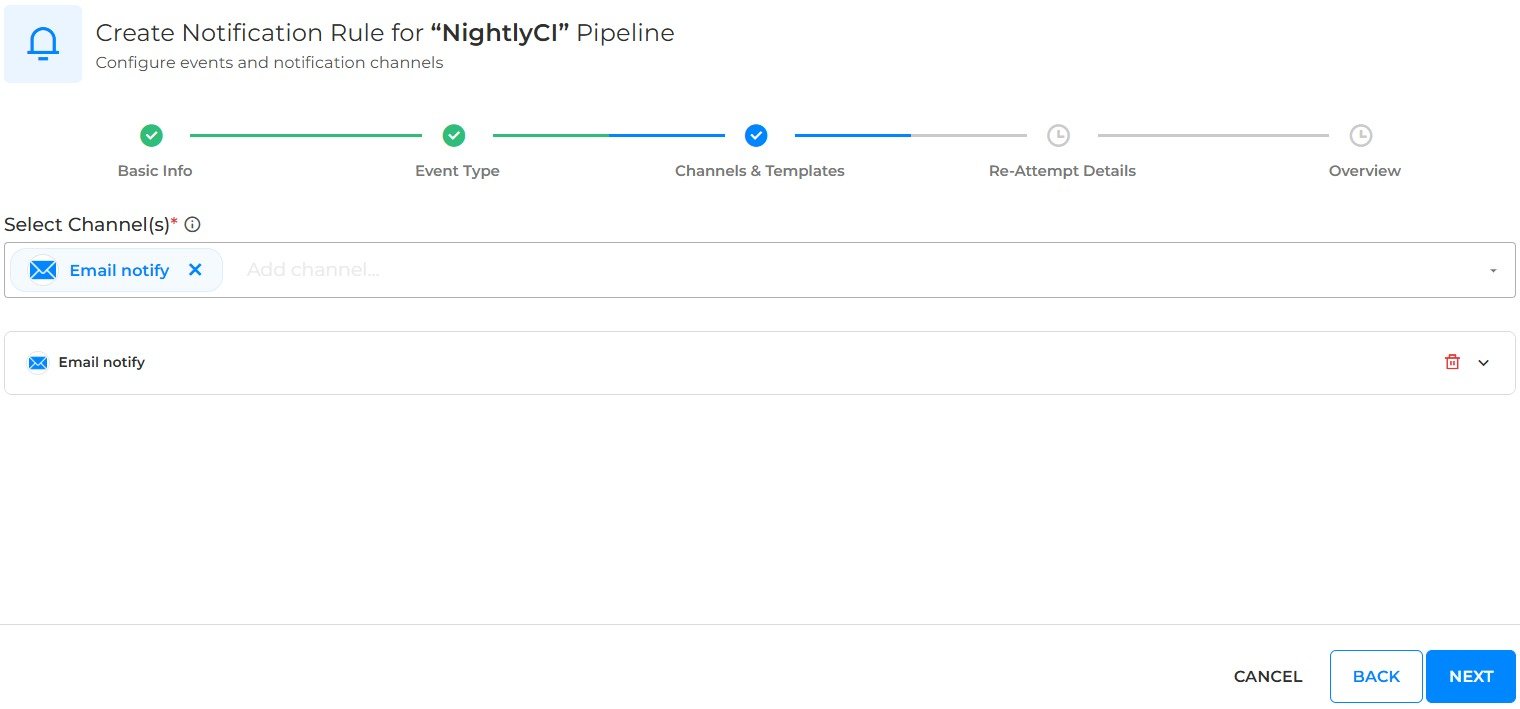
Figure 6: Channels & Templates
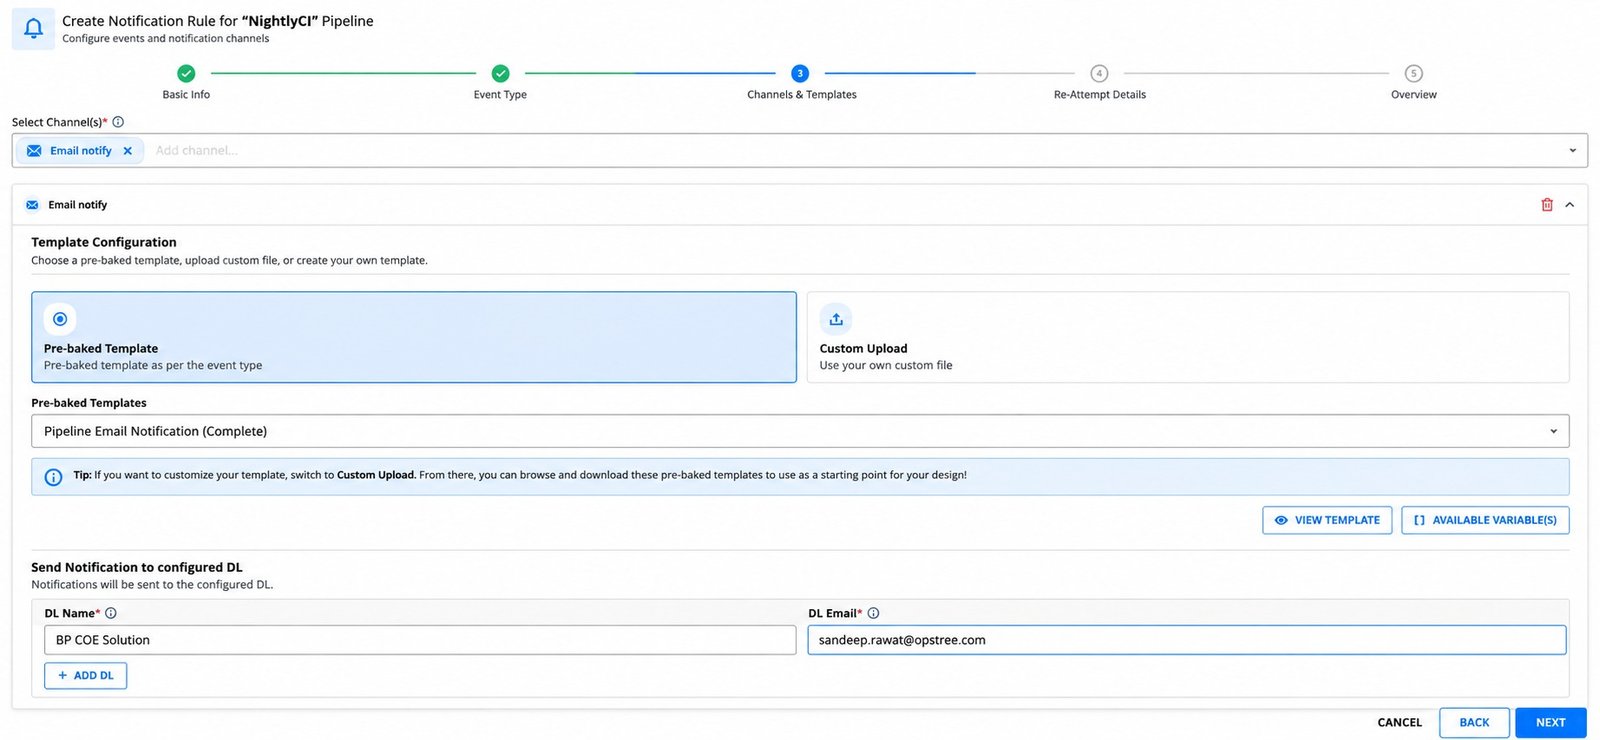
Figure 7: Channels & Templates, channel panel expanded
2.4 Step 4: Re-Attempt Details #
Set the automatic retry delays in minutes. The defaults are Re-Attempt 1 after 1 minute and Re-Attempt 2 after 2 minutes. Click Add Re-Attempt to add another one.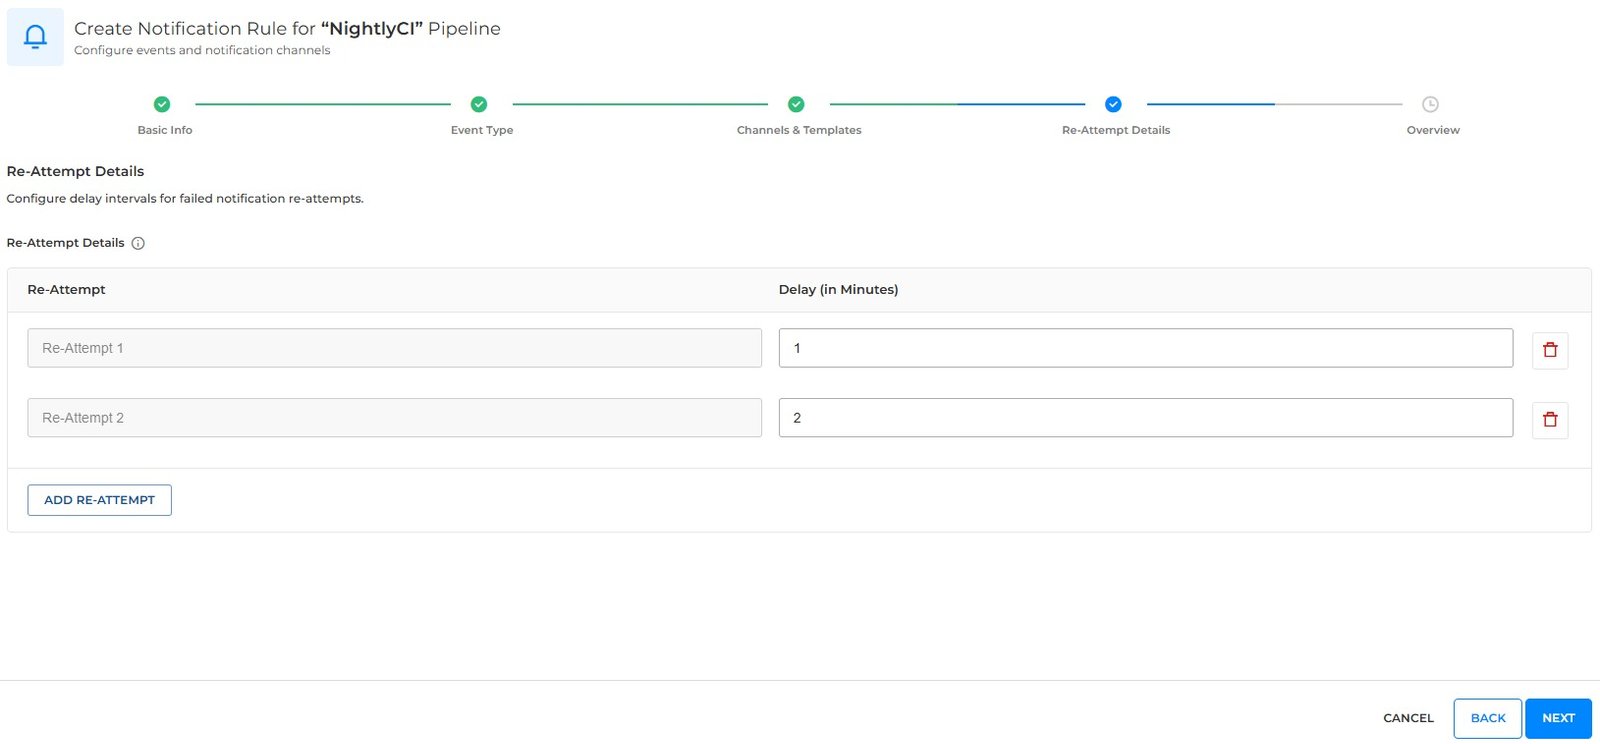
Figure 8: Re-Attempt Details
2.5 Step 5: Overview #
Review & Save summarises the rule name, status, event and the template of each channel. Click Save Rule, or Back to change something.

Figure 9: Overview
After you save, the rule appears in the list, with its On/Off toggle on.

Figure 10: The new rule in the list
3. See What a Pipeline Has Sent #
Open a pipeline run, click its three-dot menu, and select Notification History. For all notifications, use Manage Notifications.
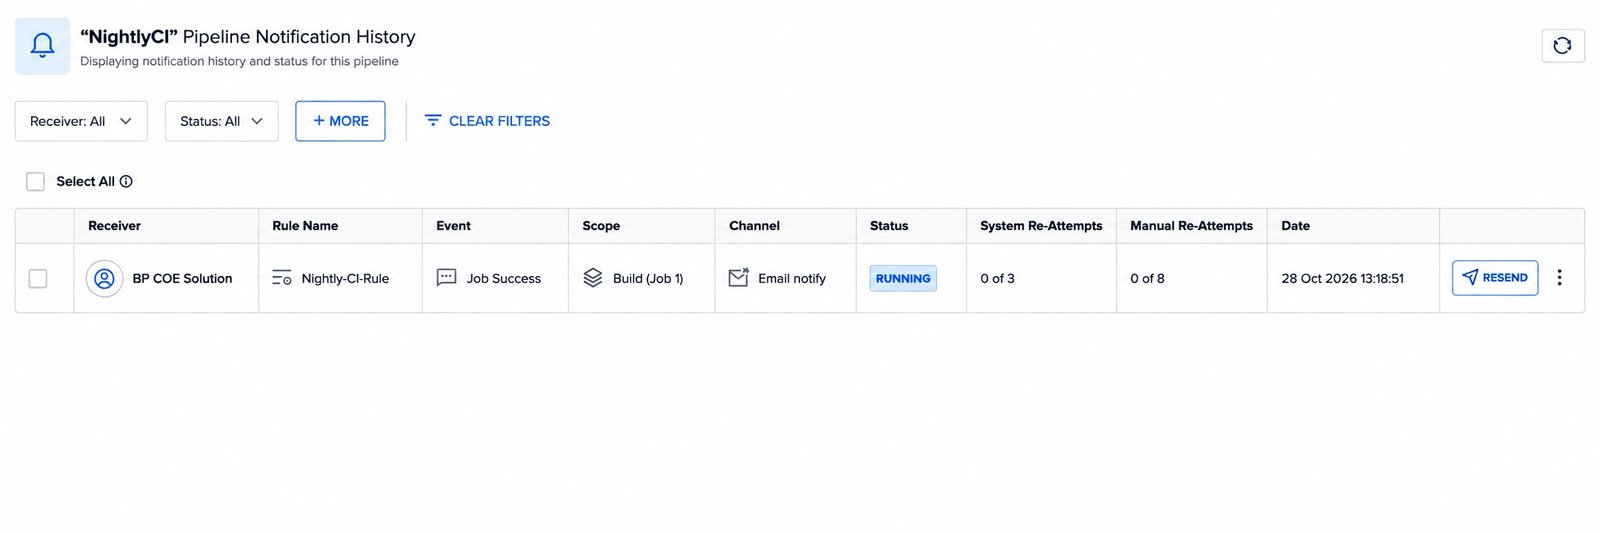
Figure 11: Pipeline Notification History
Read more: Notification Channels